
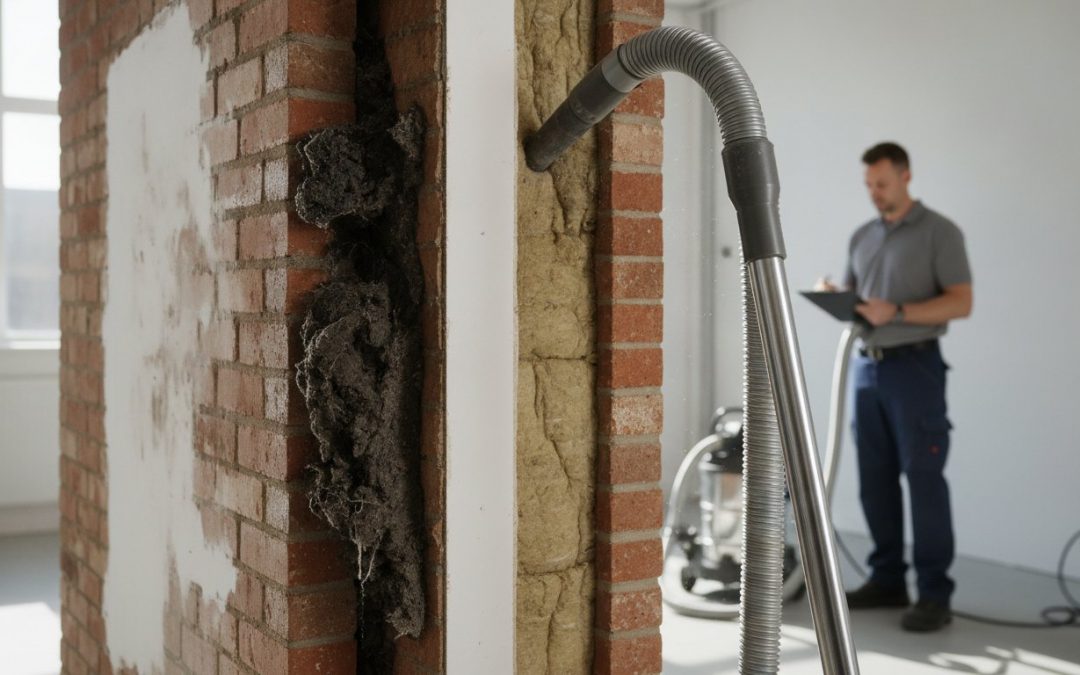
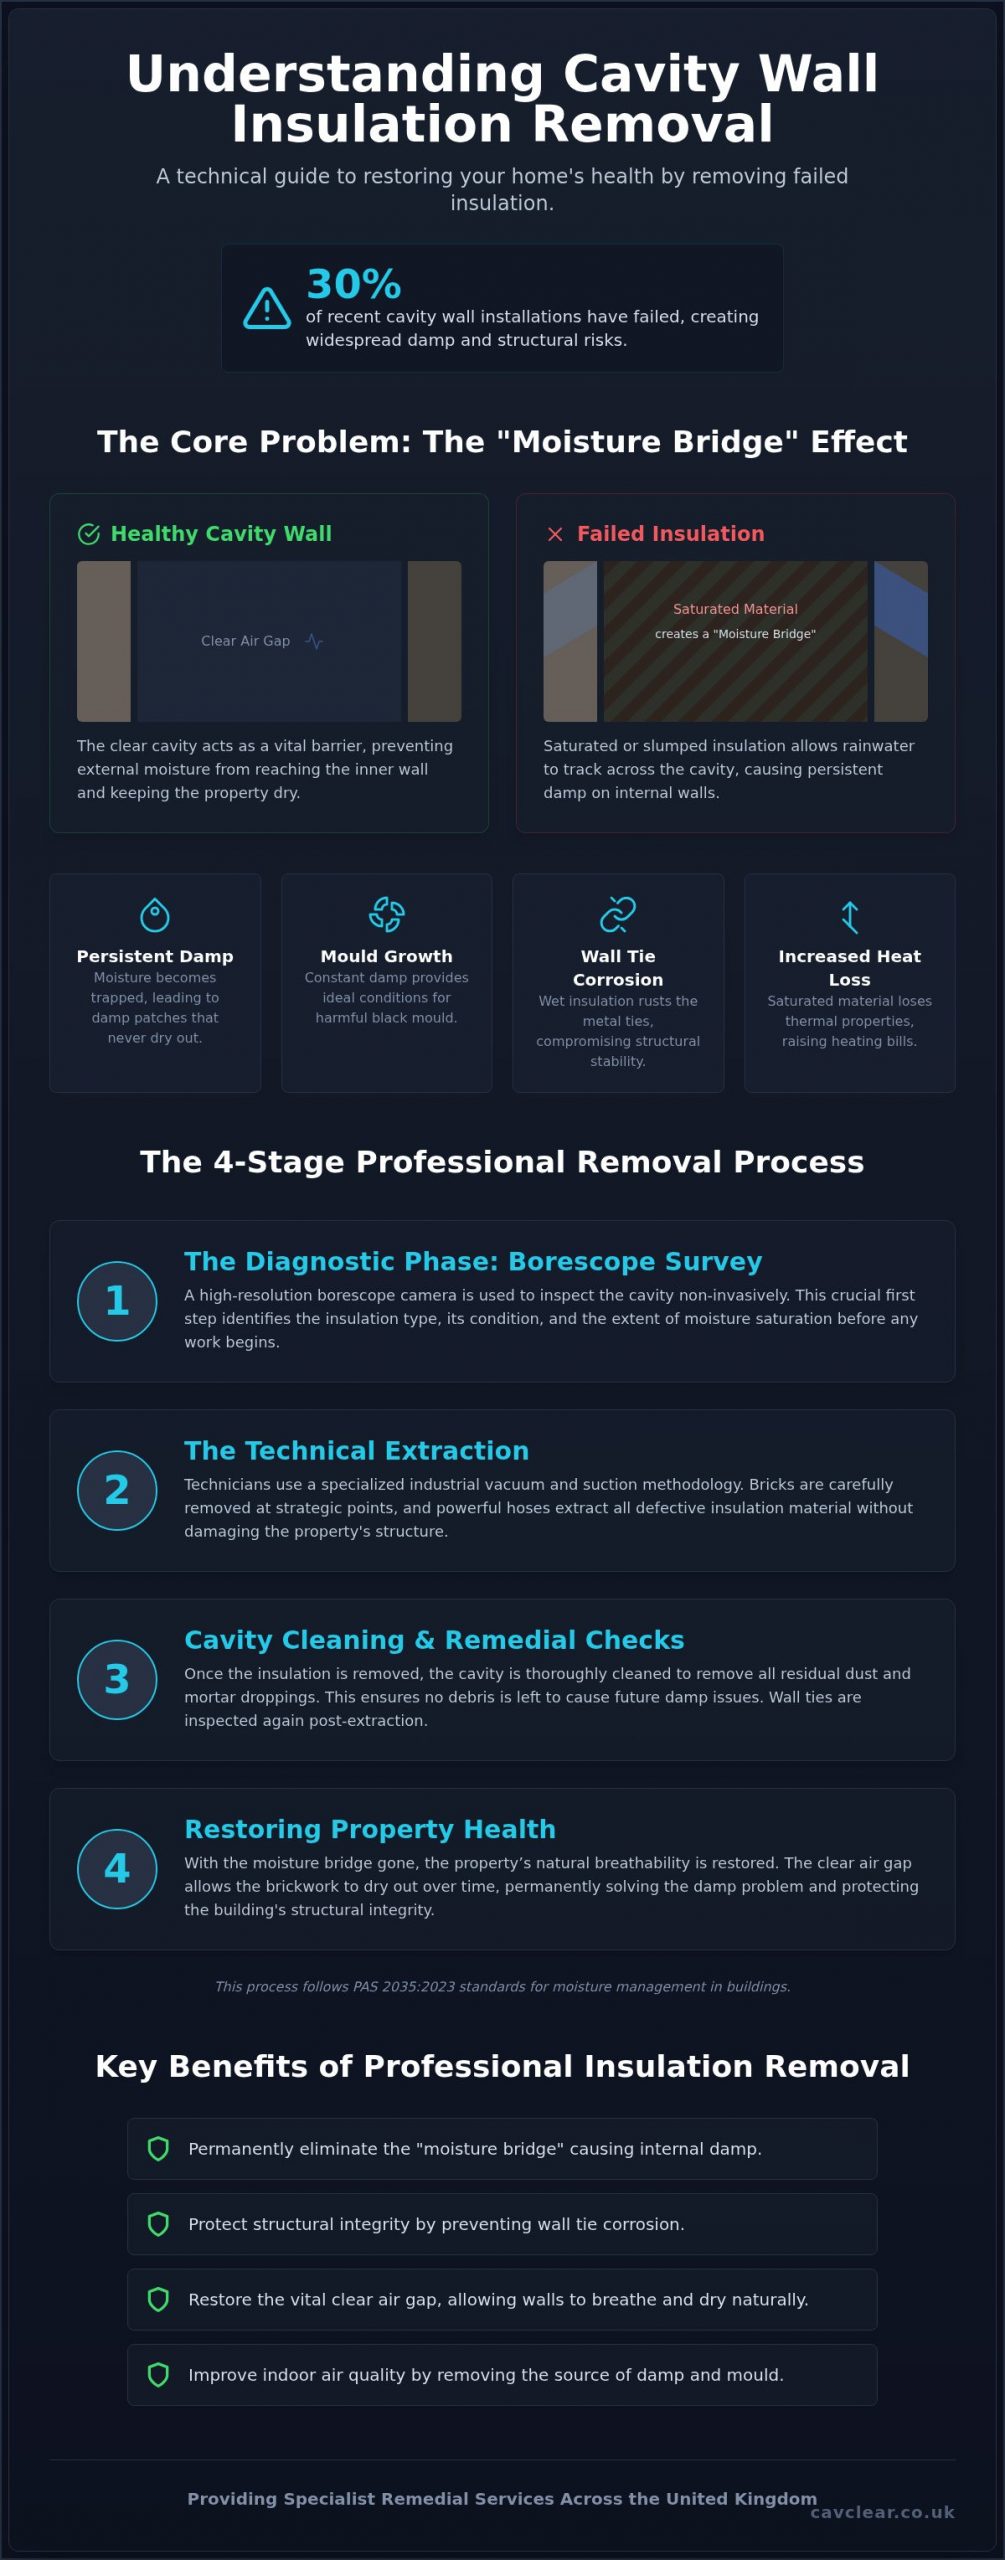
Did you know that recent audits of government-funded projects reveal nearly 30% of cavity wall installations have failed? This staggering figure explains why so many homeowners struggle with persistent damp and mould despite their efforts to insulate. If you’re facing these issues, you need to understand exactly what happens during cavity wall insulation removal to ensure your home’s structural health is restored correctly. This process isn’t just a simple cleaning task; it’s a precision remedial surgery designed to restore the vital clear air zone that protects your property from moisture bridging and wall tie corrosion.
It’s frustrating to deal with high heating bills and cold spots when you’ve already invested in insulation. We understand the stress that comes with the fear of structural damage during an extraction. This guide provides a detailed look at the step-by-step technical process our accredited technicians use to remove defective materials safely, following the latest PAS 2035:2023 standards for moisture management. You’ll learn about the specialized industrial vacuums involved, the exact timeline for the work, and how we ensure your property remains clean and structurally sound throughout the restoration.
Key Takeaways
- Discover exactly what happens during cavity wall insulation removal, focusing on the specialized suction methodology that extracts defective material without damaging your brickwork.
- Understand the “moisture bridge” effect and why removing failed insulation is the only way to permanently stop damp and protect your property’s wall ties.
- Learn how professional borescope surveys provide a clear, non-invasive view of the material state within your walls before any extraction work begins.
- Identify why the cleaning stage is just as critical as the extraction, ensuring all residual dust and mortar droppings are removed to prevent future damp issues.
- Gain clarity on the restoration timeline, including how removing the moisture bridge enables your property to dry out and regain its natural breathability.
Understanding the Need for Cavity Wall Insulation Extraction
Cavity wall insulation extraction is the specialized process of removing defective, old, or moisture-laden insulation from the void between a property’s internal and external walls. While originally intended to improve thermal efficiency, many installations have become counterproductive due to poor workmanship or unsuitable property locations. When insulation fails, it no longer provides a thermal barrier; instead, it becomes a liability that threatens the structural health of your home.
A primary reason for extraction is the “moisture bridge” effect. In a healthy property, the cavity acts as a vital buffer zone. However, when insulation becomes saturated, it allows rainwater to travel from the external brickwork directly to the internal leaf. Understanding Cavity Walls is essential for property owners; the original design relies on a clear air gap to prevent damp transfer. When this gap is filled with unsuitable or degraded material, the structural integrity and internal environment suffer. This is particularly common in the UK, where high wind-driven rain zones often make retrospective insulation unsuitable. Persistent rain forces water through porous bricks, and if the cavity is packed with material, that water has nowhere to go but inward. This leads to interstitial condensation, where moisture remains trapped within the insulation material, preventing the walls from ever truly drying out.
Signs Your Insulation Has Failed
You might notice persistent damp patches on internal walls that don’t disappear, even during dry spells. These often correlate with cold spots where the insulation has slumped or become sodden. Visible black mould growth and a persistent musty odour are clear indicators of a failing system. Paradoxically, you may also see your heating bills rise. Saturated insulation loses its thermal resistance and instead acts as a heat sink, drawing warmth away from your living spaces and out through the external walls.
The Structural Risk: Wall Tie Corrosion
The presence of wet insulation creates a highly corrosive environment for the metal ties that hold your walls together. When these ties are constantly exposed to moisture trapped by failing insulation, they begin to rust and expand. This process can lead to horizontal cracking in the mortar joints and the eventual instability of the outer leaf. Professionals often recommend a wall tie replacement alongside extraction to ensure long-term structural safety. Knowing what happens during cavity wall insulation removal includes recognizing that the goal is not just to stop damp, but to protect the building’s skeleton from permanent damage.
The Diagnostic Phase: Specialist Surveys and Borescope Inspections
Every successful remedial project begins with a comprehensive diagnostic phase. You can’t simply guess what’s happening inside your walls based on internal damp patches alone. A professional survey is essential because it identifies the specific failure points that lead to moisture ingress. This phase is when our technicians determine exactly what happens during cavity wall insulation removal for your specific property. We utilize high-resolution borescope cameras to gain a visual entry into the cavity. By drilling small, non-invasive holes in the mortar joints, we insert a lens to inspect the condition of the material, the presence of moisture, and the state of the wall ties.
The surveyor’s role extends beyond just looking at the insulation. They map “cold spots” and look for areas of slumping where the material has settled at the base of the wall. This is critical because settled insulation leaves the upper wall uninsulated while the bottom becomes a saturated mass. These issues have been documented in official reports on insulation risks, which highlight how water penetration is often exacerbated by the wrong materials. To ensure the correct remedial path, we often recommend a professional damp survey to rule out other sources of moisture before starting any extraction work.
Identifying the Insulation Type
We must distinguish between mineral wool, bonded beads, and urea-formaldehyde foam. Each material reacts differently to extraction machinery. Mineral wool often becomes a heavy, sodden mass that requires high-pressure suction. Bonded beads are easier to flow but can be tricky if the original adhesive has failed. Foam insulation presents the most challenge; as it ages, it becomes brittle and breaks into fine dust, requiring specialized filtration and careful handling to ensure a complete clean of the cavity void.
Mapping the Cavity Condition
During the inspection, we also look for “snots” or mortar droppings that may have accumulated on wall ties during the original build. These act as mini-bridges for water to cross the cavity. We also locate blockages around windows, doors, and air bricks that could impede the extraction process. By determining the exact volume of material and the level of debris, we provide an accurate project timeline and ensure the property is restored to its original clear-state. If you suspect your home is suffering from failing insulation, booking a specialist cavity wall inspection is the first step toward restoring your home’s health.
The Technical Extraction Process: How Insulation is Safely Removed
The removal phase is a controlled engineering task performed almost entirely from the property’s exterior. This ensures zero internal disruption for the homeowner, as technicians don’t need to enter your living spaces to access the wall voids. A standard UK semi-detached property typically takes between 1 and 2 days to complete, depending on the material type and the extent of any moisture saturation. It’s a methodical process that relies on a “gravity and suction” methodology. We don’t use standard shop vacuums; instead, we deploy high-powered industrial extraction units. These machines provide the high cubic feet per minute (CFM) airflow required to pull heavy, sodden insulation from the depths of the wall without leaving residual pockets behind.
Step 1: Creating Strategic Access Points
Technicians start by drilling 22mm access points into the mortar joints. We avoid drilling into the bricks themselves to prevent aesthetic damage and maintain the structural face of the masonry. These holes follow a specific geometric pattern across the elevations. This pattern is designed to provide 100% coverage of the internal void, ensuring no “dead zones” are left unaddressed. We always begin the extraction at the lowest points of the wall. By clearing the base first, we allow the upper layers of insulation to drop naturally under gravity. This makes the entire process more efficient and ensures a more thorough clean.
Step 2: Agitation and Suction
To fully understand what happens during cavity wall insulation removal, you have to look at how we deal with compacted or moisture-damaged materials. We use compressed air “wands” to agitate and break up mineral wool or brittle foam that has clumped together over time. This agitation is essential for materials that have become moisture-saturated and heavy, as they often stick to the internal leaf of the wall. Once the material is loosened, the industrial suction units draw it through a flexible hose system directly into sealed collection bags. This containment prevents any insulation fibers or dust from contaminating your garden or driveway.
Step 3: Clearing Around Obstructions
Obstructions like window sills, door frames, and vent grilles require specialist attention. We use smaller directional nozzles to ensure no insulation is left trapped in these tight spaces, which could otherwise lead to localized damp spots. It’s particularly important to ensure that all air bricks are fully cleared. Blocked air bricks lead to poor sub-floor ventilation and subsequent timber decay in older properties. After the bulk removal, we conduct a final borescope inspection. This visual check confirms that the wall cavity is completely clear, allowing the building’s natural breathability to return and securing the long-term health of the structure.
Beyond Extraction: Cavity Cleaning and Remedial Checks
Many homeowners assume the job is done once the bulk material is extracted. However, a vital part of what happens during cavity wall insulation removal is the meticulous cleaning of the cavity void. Simply pulling out the mineral wool or beads doesn’t account for the fine dust, fragments, or historic mortar “snots” that often cling to the internal brickwork. These residual materials are moisture-absorbent and can continue to bridge dampness across the cavity if left behind. Our technicians use high-pressure air and specialized sweeping tools to ensure every square inch of the internal leaf is clear of debris. This restoration of the clear air zone is what allows your property to breathe again, preventing the stagnant, humid conditions that lead to mould.
Once the cavity is empty, it’s the first time in decades that the wall ties are clearly visible through a borescope. We take this opportunity to inspect the ties for signs of “pitting” or expansion. Galvanized ties encased in wet insulation for long periods often show significant rust. As they corrode, they expand to several times their original size, which can force mortar joints apart and crack the external brickwork. This is the optimal time to perform a remedial wall tie replacement if we identify structural instability, as the cavity is already clear and accessible.
Making Good: Brickwork Restoration
The final stage of the process focuses on restoring your property’s aesthetic integrity. We fill the 22mm access holes with a mortar mix specifically blended to match your existing masonry’s colour and texture. Our goal is to ensure the property exterior looks untouched once the team leaves the site. We also perform a comprehensive site clean-up, using industrial vacuums to remove any stray insulation fibres from your driveway or garden. This methodical approach ensures your home is not just dry and healthy, but also structurally sound and visually restored. If you are concerned about the state of your property’s walls, you should book a professional cavity extraction survey to assess the health of your home’s structure.
Restoring Property Health: What to Expect After Removal
Once the technicians complete the extraction, the immediate threat to your home’s structural integrity is removed. Understanding what happens during cavity wall insulation removal involves recognizing that the process doesn’t end when the vacuum stops. Your property now enters a critical recovery phase. By removing the saturated material, we’ve eliminated the moisture bridge that allowed water to bypass your home’s natural defenses. This restoration of the clear air zone allows the internal and external leaves of the wall to breathe independently again. This is a vital step in providing long-term protection against black mould and preventing the gradual structural decay of your wall ties and masonry.
The Drying Out Process
Saturated brickwork doesn’t dry overnight. Depending on the level of moisture ingress and the time of year, it can take several months for the walls to release all trapped water. You’ll likely see a gradual improvement as damp patches begin to fade. To accelerate this recovery, maintain consistent internal heating and ensure adequate ventilation throughout the property. It’s essential that you don’t rush to re-decorate. Painting or papering over damp spots too soon can trap residual moisture within the plaster, leading to further bubbling or salt efflorescence. We recommend waiting until the wall is professionally confirmed as dry before starting any aesthetic repairs.
Maintaining a Healthy Cavity
A clear cavity is the most effective way to protect older UK homes from dampness. While some might suggest re-filling the void, we maintain that leaving the cavity empty is the safest choice for property longevity. This ensures that any water that penetrates the outer leaf can drain away or evaporate without reaching your internal walls. To support this, you should prioritize regular gutter maintenance. Blocked or leaking gutters are a primary source of water ingress that can overwhelm even a clear cavity. Following this maintenance routine ensures that the benefits of the extraction are permanent.
Restoring your home’s health requires more than just a surface-level fix. By understanding what happens during cavity wall insulation removal, you can appreciate the technical precision needed to extract moisture-saturated materials and restore the vital air gap within your walls. This process is the only permanent solution for recurring damp and wall tie corrosion caused by failing insulation. Our methodical approach ensures that every fragment of debris is removed, allowing your property to dry out and regain its natural breathability. This is a vital investment in the longevity of your home.
As a nationwide UK specialist, CavClear provides expert structural reports and utilizes specialist remedial technicians to ensure your property is handled with professional rigor. We focus on transparency and safety, giving you the confidence that your home will be left clean and structurally sound. Don’t let defective insulation compromise your comfort or your asset’s value any longer. Book a Professional Cavity Wall Survey with CavClear Today to take the first step toward a dry, healthy living environment. Our team is ready to help you reclaim your home’s structural integrity.
Frequently Asked Questions
Will cavity wall insulation removal make my house colder?
Removing saturated insulation often improves thermal comfort because wet material acts as a heat sink. When insulation becomes waterlogged, it loses its thermal resistance and begins conducting heat away from the inner leaf of your property. By restoring the clear air gap, you stop the moisture bridge. This allows your internal walls to dry out and regain their natural insulating properties. Most homeowners find their property feels more comfortable once the damp mass is removed.
How long does the extraction process usually take?
A standard UK semi-detached property typically requires between one and two days to complete the extraction. The exact duration depends on the material type and the degree of compaction or moisture saturation. For instance, mineral wool that has settled at the base of a wall may take longer to agitate and extract than loose-fill beads. We provide a clear timeline following the initial survey so you know exactly what to expect during the project.
Is the removal process messy for my garden or interior?
The extraction process is designed to be clean and non-disruptive to your property’s surroundings. We use industrial-grade suction units that pull the material directly into sealed collection bags. This containment system prevents dust or debris from blowing across your garden or driveway. Since the work is performed entirely from the exterior, there is no impact on your home’s interior. Our technicians perform a final site sweep to ensure no stray fibres remain after the job.
Do I need to be at home while the technicians are working?
You don’t need to be present while our technicians perform the extraction. Because the methodology is strictly external, we don’t require access to the inside of your property. As long as we have clear access to the external elevations and a power source, the team can complete the work independently. This allows you to go about your daily routine without any disruption to your schedule while your property’s structural health is being restored.
Can I re-insulate my walls after the old material is removed?
We strongly advise against the retrospective installation of cavity wall insulation after the original material is removed. UK properties, especially those in wind-driven rain zones, rely on a clear cavity to prevent moisture transfer. Re-insulating often recreates the same moisture bridge that caused the initial damp issues and wall tie corrosion. Keeping the cavity clear is the most effective way to ensure long-term breathability and protect the structural integrity of your home’s masonry.
What is the typical cost of cavity wall insulation extraction in 2026?
Project costs vary based on the property size, the type of insulation material, and the difficulty of access. While industry reports provide average rates for extraction, every property requires a bespoke assessment to determine the specific technical requirements. Factors such as the presence of debris or the need for remedial wall tie work will influence the final scope. We recommend booking a specialist survey to receive a detailed breakdown tailored to your property’s unique structural needs.
Will the drilling damage my external brickwork or render?
The drilling process is highly controlled and targets the mortar joints rather than the bricks or render. We use small 22mm drill bits to create access points that are easily restored after the extraction. Once the work is finished, we fill these holes with a mortar mix that matches your existing masonry. This ensures the property exterior remains visually untouched. For rendered properties, we use specialized matching techniques to maintain a seamless and professional finish.
How do I know for sure if my insulation needs removing?
Identifying the signs of failure is the first step, but a professional borescope inspection is the only way to be certain. If you experience persistent damp patches, black mould, or unexplained cold spots, it’s likely your insulation has failed. A specialist survey allows us to see exactly what happens during cavity wall insulation removal before the work begins. Our technicians insert a camera into the wall to verify if the material is slumped, sodden, or bridging moisture.
Recent Comments