
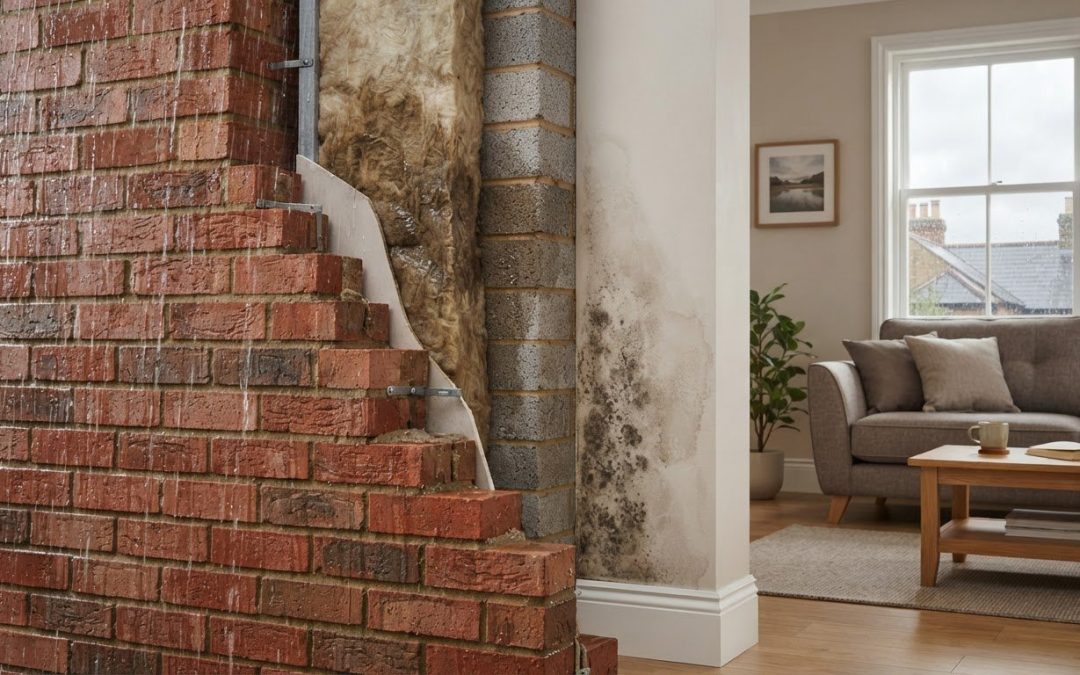
Yes, wet cavity insulation can cause mould if moisture passes through the wall and reaches internal surfaces. Wind-driven rain can penetrate exposed brickwork, and fully filling cavities in high-exposure zones can increase the risk of rain penetration. Insulation is not the only possible cause, so damp and mould should be considered alongside the external wall’s condition and indoor ventilation.
Musty smells, mould patches or damp areas on internal walls can be concerning. The first step is to identify where the moisture is coming from before deciding whether the insulation needs attention. Rain penetration, installation faults and wet or degraded material can all contribute, but similar symptoms can have other causes. Knowing the difference helps determine whether a closer inspection is needed.
Symptoms may appear long after insulation was installed. A cavity inspection can help establish what is happening inside the wall and whether cavity wall insulation removal may be appropriate. Identifying the likely cause helps distinguish a cavity-wall issue from other sources of moisture and points towards a practical next step.
Key Takeaways
- Persistent damp or mould can have several causes, so the pattern of damage and the cavity’s condition help guide the investigation.
- Wet insulation may hold or transfer moisture, while gaps and uneven installation can contribute to local cold spots and condensation.
- External wall condition and exposure to wind-driven rain are important when assessing whether a property is suited to cavity insulation.
- Removal may be considered when an inspection finds defective or moisture-affected insulation and the problem is linked to the cavity.
- A specialist cavity wall survey can help clarify the cause and whether cavity wall insulation removal or other cavity-wall work is appropriate.
Can Cavity Wall Insulation Cause Damp and Mould?
Yes, wet cavity insulation can cause mould if moisture crosses the cavity and reaches the inner wall. The source and route of moisture matter, so mould alone cannot confirm insulation failure.
Moisture Bridging and Indoor Mould
Moisture bridging happens when water passes from the outer wall across insulation or cavity obstructions to the inner wall. If internal plaster or masonry becomes damp, mould can grow on the surface, particularly when the moisture persists.
Wind-driven rain can enter through exposed or defective brickwork and travel through insulation that contacts both sides of the cavity. Fully filling cavities in high-exposure zones can increase the risk of rain penetration. Damp patches on internal walls may be linked to the cavity, but other moisture sources should also be considered.
Loose debris in the cavity can also create a path for water. Mortar droppings around wall ties or unevenly packed insulation may allow moisture to cross the gap instead of draining down the outer leaf.
Early Installation Problems and Failure Signs
Some older insulation materials can deteriorate, and installation quality affects how well the cavity performs. Urea-formaldehyde foam was widely used in the 1980s and 1990s and can degrade over time; homes insulated in the 1970s or 1980s may also contain degraded material.
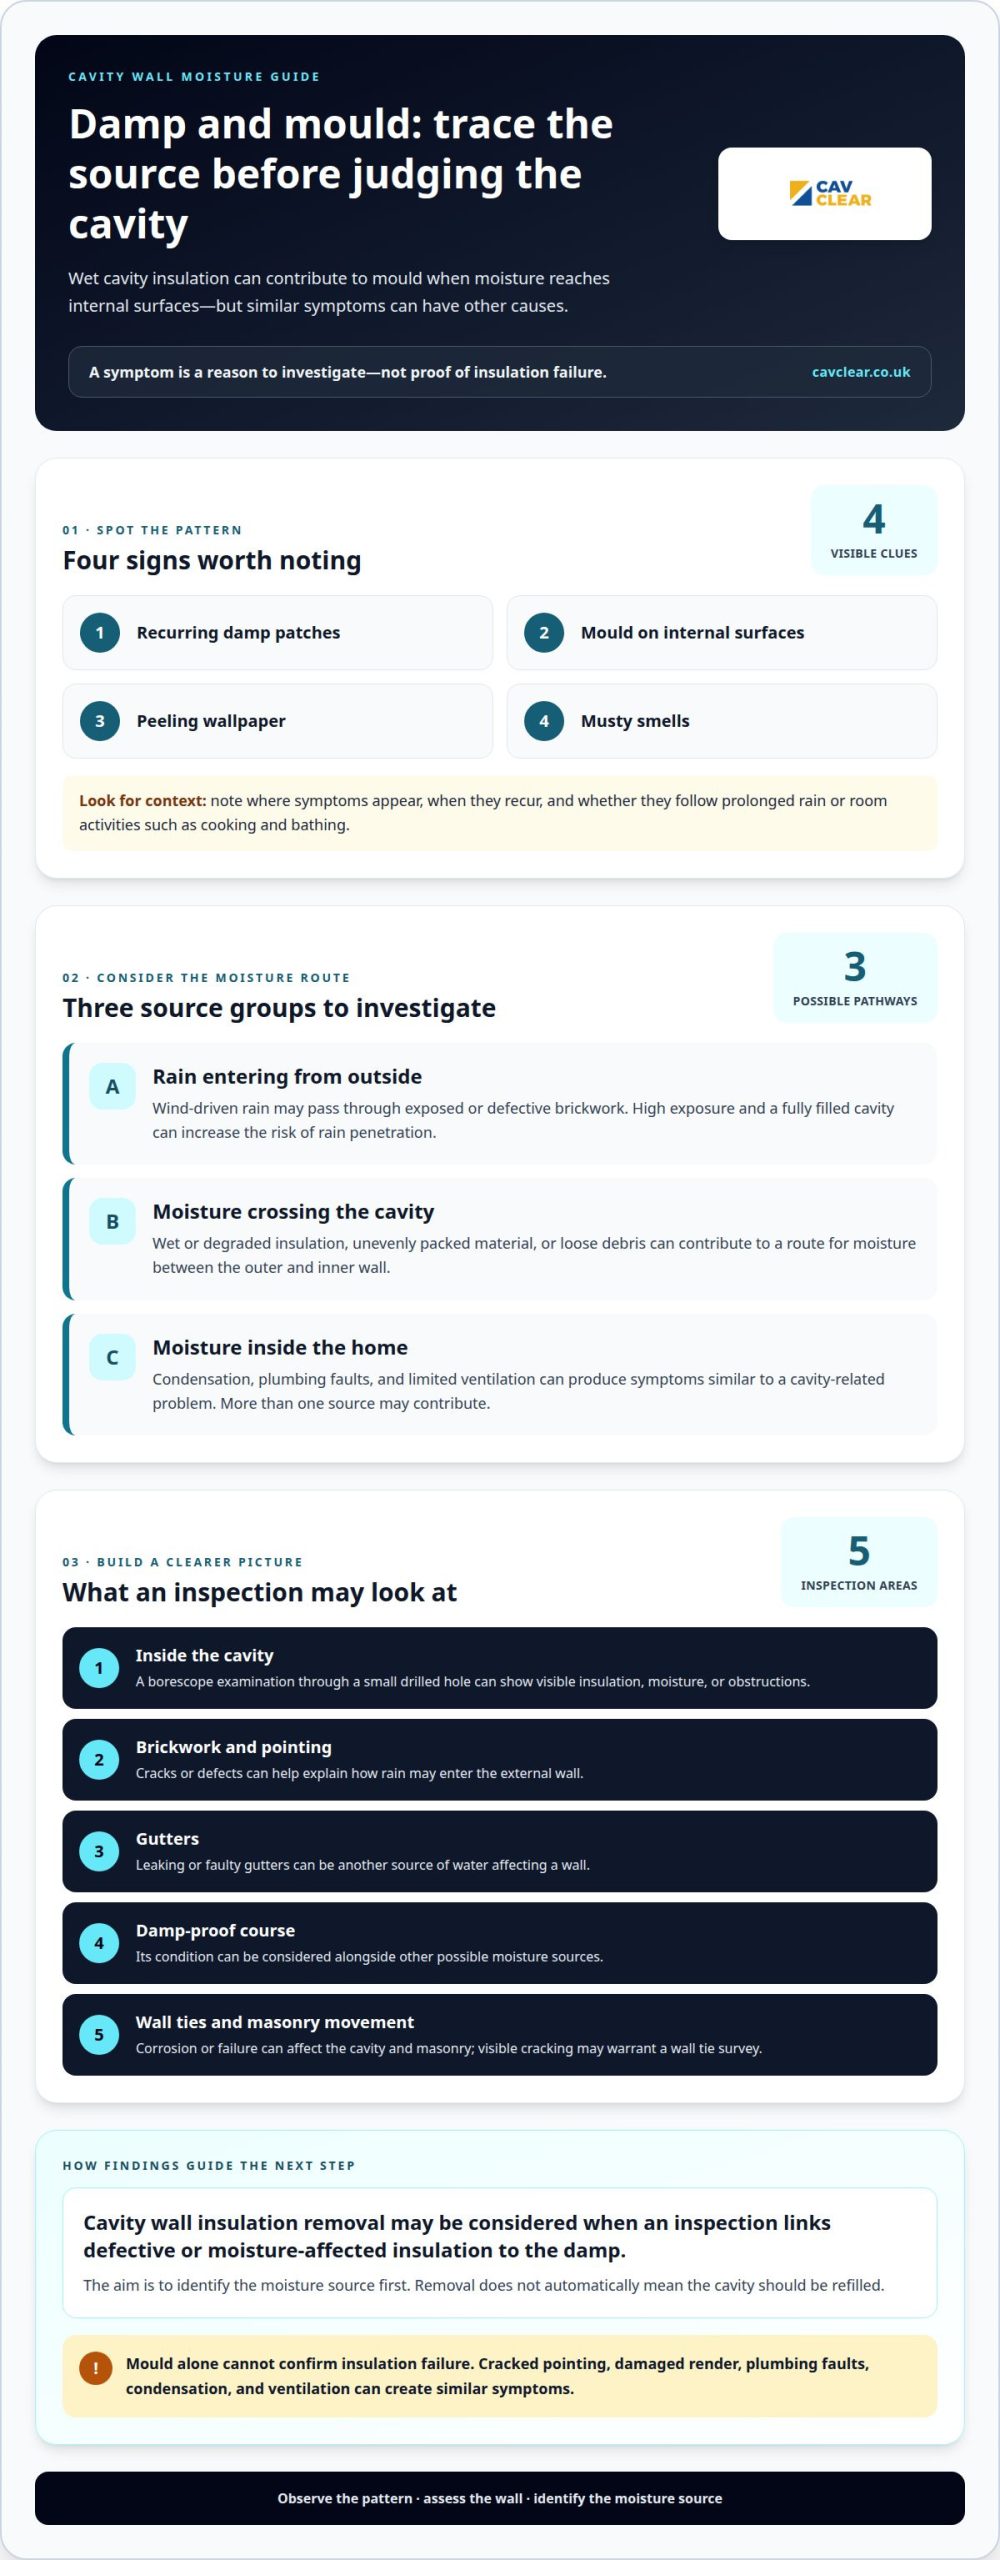
Look for recurring damp patches, mould, peeling wallpaper or musty smells on internal walls, especially after prolonged rain. These signs warrant investigation, but do not prove that insulation is at fault. Cracked pointing, damaged render, leaking gutters, plumbing faults and limited ventilation can cause similar symptoms.
Uneven filling, gaps, debris or settled material can affect how moisture moves inside a cavity. A borescope examination through a small drilled hole lets an inspector view the insulation and check for visible moisture or obstructions.
Repair Responsibility and Mould Prevention
Mould alone cannot identify what needs repairing. First establish the moisture source: faulty insulation, rain entering through external masonry, a plumbing leak or condensation may each need a different remedy. Installation records and inspection findings can help clarify which work is needed.
A cavity inspection can include a borescope examination of the insulation and checks of external brickwork, pointing, gutters and the damp-proof course. These checks help distinguish a cavity problem from water entering elsewhere. Wall ties are also relevant: corrosion or failure can affect the cavity and masonry, so visible cracking may warrant a wall tie survey.
After repairs, address the identified moisture source and allow affected materials to dry. Use kitchen and bathroom extractor fans and maintain ventilation to limit the build-up of moist air. Cavity wall insulation removal may be considered if an inspection links the material to damp; removal does not automatically mean the cavity should be refilled.
The relationship between wet insulation, damp and mould
Wet insulation and indoor mould can be connected through moisture, but visible mould grows on room surfaces. Understanding how damp persists indoors can help distinguish a cavity-related concern from everyday condensation.
Insulation Condition and Damp
Once moisture affects internal building materials, a wall may take time to dry, even after the original source has been addressed. Plaster, wallpaper and furnishings can retain moisture and remain vulnerable to mould growth. Drying the visible surface alone may not resolve the underlying damp.
Changes in a room can provide useful context. For example, a damp mark that remains after nearby furnishings have been moved may suggest the wall still holds moisture. By contrast, condensation on a window after cooking may be more closely related to indoor humidity. Neither observation proves the cause, but noting when and where symptoms occur helps build a clearer picture.
Wet Insulation and Mould
Mould develops when indoor surfaces stay damp. Wet insulation can contribute to a wider moisture problem, but indoor conditions determine where mould becomes visible. Wallpaper behind a wardrobe, for instance, can remain damp because airflow is restricted, even if the rest of the room appears dry.
Room use matters too. Showering, cooking and drying laundry release moisture into the air. If it settles on a cool surface, condensation can form independently of a cavity defect. More than one source may contribute, so cleaning visible mould without addressing continuing damp can leave the area vulnerable to regrowth.
Signs of Damp, Condensation and Mould
Look beyond the most obvious patch. Check whether mould is concentrated behind furniture, inside cupboards or around window reveals, and note whether airflow is limited in those areas. Compare observations across rooms and after activities such as cooking or bathing. A written record can help show whether the pattern follows room use or consistently affects one wall.
Also note changes to paint, wallpaper and stored belongings near affected surfaces. If mould keeps returning despite ordinary cleaning and ventilation, further assessment can help establish whether a cavity issue is contributing. CavClear’s cavity wall insulation removal may be relevant when inspection findings connect defective insulation with the damp.
Before insulation is installed, address cracked pointing, damaged render, blocked gutters and a failed damp-proof course. Poor ventilation can also trap moisture and contribute to damp and mould.
Many affected Cheshire homes were insulated under government energy efficiency schemes in the 2000s and 2010s; problems appeared 10 to 20 years later in some. Houses built in the UK between 1920 and 1990 may have uninsulated cavities, while materials in homes insulated in the 1970s or 80s may have degraded.
Poor installation, gaps, voids, and cold bridges
Unevenly installed cavity wall insulation can leave parts of a wall less protected than others. Gaps may occur around window reveals, corners or changes in wall construction, where consistent coverage is harder to achieve. Those areas can feel colder than nearby surfaces. When warm indoor air reaches a cold patch, condensation can form there, making it more vulnerable to mould.
The pattern indoors can offer clues. A narrow cold strip beside a window, for example, differs from a broad patch across an entire wall. Note where the affected area is, whether it returns after cleaning and whether nearby rooms show a similar pattern. These observations help describe the issue, but a cold surface alone cannot establish how insulation was installed or what caused the temperature difference.
Voids can also affect comfort unevenly. A section without insulation may feel noticeably colder in cold weather, while nearby areas remain warmer. This contrast may lead occupants to increase the heating in one room or move furniture against the cold surface. Furniture placed tightly against the wall can restrict airflow and slow drying when condensation occurs.
Cold bridges can occur where building elements meet, including around openings and floor edges. For example, a cold line where an external wall meets the ceiling may relate to the building detail rather than a gap in the insulation. This distinction matters because surface mould does not identify the fault. Consider the shape and position of the cold area alongside the wall’s construction.
Installation faults may produce irregular patterns rather than one continuous cold area. A cold patch at one window, with no similar change at another, gives different information from matching patches across several external walls. Record these differences and note when they are most noticeable. A qualified assessment can then consider the installation layout and building details without treating every cold spot as proof of failed insulation.
Decisions about remedial work depend on the cause, not simply the presence of a void or cold bridge. If the issue relates to a local building junction, insulation removal may not address it. If an inspection finds that defective or unevenly installed material is contributing to persistent cold areas or damp, remedial options can be considered. A specific diagnosis helps avoid work that does not resolve the actual fault.
Property suitability and exposure to wind-driven rain
In the UK, wet cavity insulation can result when wind-driven rain reaches the cavity through an exposed outer wall. The effect on a particular home depends on its exposure, wall construction and insulation condition. Consider each elevation separately: the side facing prevailing weather may experience different conditions from a sheltered side, so one wall’s performance does not necessarily represent the whole building.
Exposure depends on the building’s setting and surrounding features. An open position with little shelter may leave one elevation more exposed to driving rain than a wall protected by neighbouring buildings. Roof overhangs and extensions can also change how weather reaches parts of a façade. These differences matter when damp appears in one room but not elsewhere, as the affected room may sit behind a more exposed section of the building.
Wall construction also affects how a cavity handles moisture. Its width and continuity, the type of masonry and the building’s layout all matter. A narrow cavity leaves less space between the wall leaves, while irregular construction can create different conditions across an elevation. An assessment should take these characteristics into account rather than assume all cavity walls perform alike.
The presence of insulation does not establish that a property was suitable in every respect or that the material has failed. The key question is whether the wall and cavity can manage rain exposure without transferring moisture indoors. A sheltered rear elevation and an exposed side wall, for example, may have different conditions within the same house. Interpret findings in that context.
Useful observations include which side of the home is affected, whether symptoms follow periods of rain and whether other elevations show similar changes. Note the affected rooms’ position relative to external walls, corners and extensions. This helps relate indoor conditions to the building’s layout without treating one visible symptom as a diagnosis.
A property-specific assessment brings together the building’s exposure, cavity arrangement, insulation condition and location of internal symptoms. It can help establish whether rain penetration is a credible concern or whether another moisture source needs attention. This distinction matters before deciding on remedial work, as the same approach will not suit every elevation or property.
When insulation may need removal
Cavity wall insulation removal may be considered when an inspection links the material to persistent moisture inside the home. Recurring damp after rainfall, wet material visible through a borescope or insulation bridging the cavity can indicate a cavity-related fault. Mould alone cannot establish the cause. The assessment needs to connect internal symptoms with the insulation’s condition and the route water takes through the wall.
Start with evidence, not assumptions. A borescope camera inserted through a small drilled hole can show the insulation’s condition and any visible moisture in the area examined. The inspection should also assess external brickwork, pointing, render and gutters, as rain entering through a defect can keep the cavity wet. A camera view covers only a limited area, so consider the findings alongside the damp pattern and external wall condition.
Removal may be appropriate when inspection findings show that failed, wet or displaced material is contributing to damp, or that insulation and cavity debris are creating a moisture bridge. For example, recurring damp patches on an exposed wall, together with wet insulation and defective pointing, warrant a joined-up assessment. Repairing the source of water entry remains important: removing insulation alone will not fix cracked pointing or a leaking gutter.
Other signs can affect the scope of remedial work. Cracks in brickwork or evidence of movement may point to a wall-tie concern, rather than an insulation issue alone. A cavity assessment can consider both and help distinguish moisture-related insulation problems from failing ties. The location and pattern of cracks, the condition of the ties and visible cavity conditions all inform the next steps.
Cavity wall insulation removal requires specialist equipment and trained professionals. The material is removed from the cavity, and its condition informs any further work. Removal does not automatically mean the cavity should be refilled. The priority is to address the moisture source and ensure the wall system is suitable for its conditions.
Where persistent damp coincides with inspection findings inside the cavity, a specialist assessment can establish whether removal is appropriate. Discuss your cavity wall findings to explore a suitable remedial approach.
If damp or mould issues arise under the guarantee, the insulation will be inspected and may be removed and replaced. These figures describe removal, rather than a complete removal-and-replacement job, so the scope of the work matters when considering an estimate.
Removing failed insulation typically takes a few days to a week, depending on the work required. These estimates provide context for planning, but they do not determine whether removal is appropriate; that decision rests on the inspection findings and the condition of the wall. Cavity wall insulation should last 25+ years when properly installed, so evidence of damp or failure should be assessed against the material’s condition and the circumstances of the installation.
CavClear: Cavity Wall Insulation Removal
CavClear can help when a cavity inspection links damp or mould to defective insulation. Cavity wall insulation removal addresses material identified as wet, displaced or otherwise contributing to moisture problems. Where inspection also finds concerns with wall ties, CavClear provides Wall Tie Surveys and Wall Tie Replacement. Findings help establish which cavity-wall work is relevant, rather than assuming mould alone identifies the fault.
If damp patches keep returning or an inspection reveals affected insulation, contact CavClear to discuss the findings and appropriate next steps. A cavity assessment can help clarify whether removal or related cavity-wall work is right for your property.
Choose a clear next step for your home
If you’re asking whether wet cavity insulation can cause mould, the next step is to establish whether moisture is coming through the cavity. A clear diagnosis helps distinguish insulation problems from other faults and keeps remedial work focused on your property’s needs.
CavClear provides cavity wall insulation removal when defective insulation is contributing to damp. If an inspection identifies a separate wall-tie concern, Wall Tie Surveys and Wall Tie Replacement can address it. The aim is to understand the cause before deciding what work is appropriate.
Share your concerns and any inspection findings with CavClear to discuss a practical way forward. Contact CavClear to discuss your concerns. A considered assessment can help you move towards a drier, more comfortable home.
Frequently Asked Questions
How does wet cavity insulation lead to damp and mould?
Wet insulation can contribute to damp when moisture crosses the cavity and affects the inner wall. Mould may then grow on persistently damp plaster, wallpaper or furnishings. For example, a water path around a wall tie or mortar obstruction can leave a localised damp area inside. The location of the damage can help guide an inspection, but it cannot identify the moisture route by itself.
What signs indicate cavity wall insulation is wet or causing mould?
Recurring mould on an external-facing wall, persistent musty smells and damp plaster can indicate a moisture problem. Salt deposits or damaged skirting near an affected wall may also warrant attention. Note whether symptoms worsen after rain, appear in one area or occur across several rooms. These details help distinguish a local cavity issue from broader moisture conditions, but a visual check indoors cannot confirm that insulation is wet.
How can you tell whether mould is caused by wet cavity insulation or another damp problem?
Compare the mould’s position with the outside wall, nearby plumbing and room ventilation. A patch beneath a leaking pipe suggests a different moisture route from damp on an exposed wall that worsens after rainfall. An inspection can assess the cavity and external masonry, while a borescope shows conditions only at the point examined. Considering the findings together helps distinguish insulation-related moisture from leaks or condensation.
Can wet cavity wall insulation be dried, or does it need to be removed?
Drying the room’s surface does not establish that insulation inside the cavity has dried or that the moisture source has stopped. First identify and address water entry, then inspect the material’s condition. Cavity wall insulation removal may be considered if findings show defective insulation is contributing to damp. The appropriate remedial work depends on the inspection findings, not mould’s appearance alone.
Recent Comments