
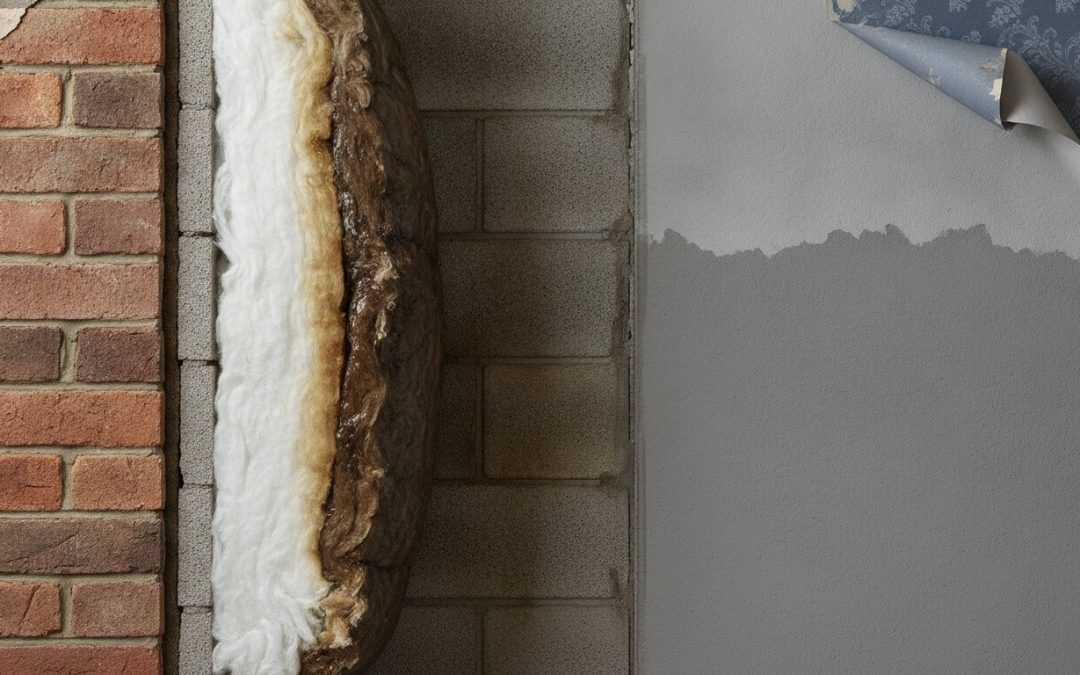
The very material installed to keep your home warm could be acting as a bridge for moisture to travel directly into your living space. When cavity insulation becomes saturated or was installed in a property with existing structural defects, it stops being an asset and becomes a serious liability. Identifying the early signs of damp from cavity wall insulation is the only way to stop hidden moisture from compromising your masonry and corroding vital wall ties.
It’s frustrating to deal with persistent black mould or unexplained cold spots in rooms that should be comfortable. You shouldn’t have to live with musty smells or the anxiety of hidden structural damage caused by poor industry workmanship. This guide will help you confirm if your insulation has failed and explain the professional steps required to restore your home’s integrity. We’ll walk through the technical indicators of failed material and how a specialist, non-disruptive extraction process provides a permanent resolution to these environmental issues. By understanding the diagnostic process, you can move from uncertainty to a clear plan for protecting your property’s health and future value across the UK.
Key Takeaways
- Understand the technical role of the wall cavity and how failed insulation creates a bridge for moisture to bypass your home’s external leaf.
- Learn to identify the visual and sensory signs of damp from cavity wall insulation, including internal tide marks, peeling wallpaper, and persistent musty odours.
- Discover the root causes of insulation failure, such as material slumping and the use of unsuitable products in high-exposure UK weather zones.
- See how specialist borescope inspections provide clear visual evidence of the cavity’s condition to confirm the source of moisture before any remedial work begins.
- Explore the professional extraction process that uses industrial vacuums to remove failed material and restore the natural airflow essential for structural health.
Understanding the Link Between Cavity Wall Insulation and Dampness
The primary function of a cavity wall is to act as a permanent moisture barrier. In standard Cavity wall construction, the external leaf of masonry is designed to take the brunt of the weather. Any water that penetrates this outer layer should naturally drain down the internal face of the bricks and exit through weep holes or dissipate via airflow. By understanding what is a cavity wall, you can see that the 50mm to 100mm air gap is the home’s first line of defence against the elements.
When this void is filled with retrospective insulation, that essential physical barrier is removed. Instead of an empty space, you now have a solid medium connecting the wet outer leaf to the dry inner leaf. This material acts as a bridge. In high-exposure zones across the UK, particularly where wind-driven rain is frequent, the external masonry can become completely saturated. If the insulation material is unsuitable or has degraded, it facilitates the transfer of liquid water directly into your living space. It’s vital to remember that the resulting moisture issues aren’t a failure of your home’s structure. They’re a direct failure of the insulation system itself, which has compromised the building’s original design.
The Science of the Moisture Bridge
Dampness often occurs through capillary action. When insulation material like mineral wool or certain foams becomes wet, it loses its thermal properties and starts to hold water like a sponge. This saturated mass then presses against the internal wall, allowing moisture to soak through the plaster. You may notice signs of damp from cavity wall insulation appearing as localized patches. These often correspond to areas where the insulation has slumped to the bottom of the cavity or where debris has created “cold bridges.” These cold spots attract internal condensation, further worsening the environmental conditions inside the property.
Why Traditional Ventilation is Compromised
A healthy cavity requires constant airflow to remain dry and functional. This ventilation allows the masonry to “breathe,” ensuring that any residual moisture evaporates quickly. Failed insulation often blocks this airflow entirely. In many cases, poor installation practices even lead to the accidental blocking of air bricks. This creates a stagnant, humid environment within the wall structure. Without the ability to dry out, the humidity levels rise, leading to persistent musty odours and the growth of black mould on internal surfaces. Restoring this breathability is essential for the long-term health of the building’s fabric.
Common Signs of Damp Caused by Cavity Wall Insulation
Recognizing the signs of damp from cavity wall insulation early is crucial for preventing long-term structural decay. These symptoms often manifest in ways that homeowners might initially mistake for lifestyle-related condensation or minor maintenance issues. However, if your property was built with a cavity and subsequently filled, these issues are frequently linked to the failure of that material. When the insulation system fails, it stops being a thermal barrier and starts acting as a reservoir for moisture.
Internal Visual Red Flags
One of the most obvious indicators is the presence of black mould growth specifically on external-facing walls. Unlike standard condensation, which might appear in any corner, this mould often follows the pattern of the failed insulation inside the wall. You might also notice salt staining or efflorescence on your interior plasterwork. These white, powdery deposits occur when moisture carries minerals through the masonry. If you see tide marks or peeling wallpaper near floor levels or around window frames, it’s often because the insulation has slumped or was incorrectly packed into these tight spaces, creating “cold spots” where moisture accumulates.
External Indicators of Cavity Failure
Your home’s exterior often provides the first clues that the cavity is no longer functioning as a moisture barrier. Look for spalling brickwork, where the face of the brick begins to flake or peel away. This happens when the insulation holds water against the outer leaf, which then expertzes and expands during winter. Cracked or crumbling mortar joints are another red flag, as they allow driving rain to bypass the outer leaf and soak into the insulation. If you notice localized patches of moss or vegetation growth on your walls, it’s a strong sign that those areas are retaining excessive moisture due to a lack of internal airflow.
Sensory and Environmental Clues
Beyond what you can see, your home will often feel different when the insulation has failed. You might experience the “cold wall” effect, where internal surfaces feel damp and significantly colder to the touch than the rest of the room. This happens because saturated insulation conducts heat away from your home rather than retaining it. You might also notice persistent musty odours that won’t go away, regardless of how much you clean or ventilate. If windows remain covered in heavy condensation that doesn’t clear, it indicates that the internal humidity levels are unnaturally high. Identifying these signs of damp from cavity wall insulation is the first step toward restoration. If these symptoms sound familiar, arranging a professional cavity wall survey can provide the technical confirmation you need to take action.
Why Cavity Wall Insulation Fails: The Root Causes
Cavity wall insulation failure is rarely the result of a single factor. Instead, it’s typically a combination of unsuitable materials, poor installation practices, and the natural limitations of the building’s design. When these elements collide, they produce the recognizable signs of damp from cavity wall insulation that compromise your home’s comfort. Understanding these root causes is the first step in moving toward a permanent technical resolution.
Material Degradation and Slumping
Many older homes across the United Kingdom contain urea-formaldehyde foam. Over several decades, this material naturally shrinks and degrades into a fine, toxic dust. This process creates significant voids within the wall, leading to cold spots and internal condensation. Similarly, mineral wool insulation often fails when it’s exposed to moisture. It acts like a fibrous sponge, absorbing water and becoming too heavy to remain in place. As the wool slumps to the bottom of the cavity, it creates a saturated mass that bridges the damp proof course. Even modern EPS beads can fail if the bonding agent wasn’t applied correctly during installation, causing the beads to settle and leave the upper sections of your walls unprotected.
Exposure Zones and Wind-Driven Rain
The UK is divided into four distinct exposure zones based on the severity of wind-driven rain. Properties located in high-exposure areas, such as coastal regions or homes on elevated hillsides, are often completely unsuitable for full-fill cavity insulation. In these zones, the outer leaf of masonry never fully dries out. If the cavity is filled, moisture travels directly across the material to the inner leaf. This saturation is a technical fault of the insulation system, which was never designed to handle the volume of water present in these specific geographical locations.
The Hidden Danger: Wall Tie Corrosion
One of the most serious consequences of failed insulation is the acceleration of wall tie corrosion. Cavity walls rely on metal ties to hold the two leaves of masonry together. When damp insulation remains in contact with these ties, the resulting humid microclimate causes the steel to oxidise. As the ties rust, they expand to several times their original size. This physical expansion exerts immense pressure on the mortar, often resulting in horizontal cracking along the external brickwork. In many cases, a professional wall tie replacement is required alongside the extraction of the failed material to ensure the property remains structurally sound. Addressing this issue promptly is vital for maintaining long-term asset health and preventing further structural decay.
Construction Debris and Cavity Bridging
During the original construction of many properties, mortar “snots” or general building rubble often fall into the cavity. If insulation is later pumped into the wall, it packs tightly around this debris. This creates a solid bridge that bypasses the natural air gap. Furthermore, if rubble accumulates at the base of the wall, it can rise above the damp proof course, allowing ground moisture to soak directly into the internal leaf. Identifying these hidden obstructions requires specialist diagnostic equipment to ensure the cavity can be returned to its original, clear state.

Assessing the Damage: The Role of Professional Surveys
While visual and sensory indicators provide a strong starting point, confirming that the signs of damp from cavity wall insulation are caused by failed material requires technical validation. Surface-level checks with a standard moisture meter are often insufficient. These devices only confirm that moisture is present on the internal plaster; they cannot identify the underlying cause within the wall structure. A professional assessment is necessary to differentiate between rising damp, penetrating damp, or a failure of the insulation system itself.
Professional reporting provides more than just a diagnosis. It creates a technical roadmap for the remedial process. If you intend to restore your property’s structural integrity, you need a report that details the exact condition of the cavity, the type of material present, and the extent of any wall tie corrosion. This level of detail is essential for insurance purposes and for ensuring that the eventual extraction process is both targeted and effective.
The Borescope Inspection Process
The most reliable method for assessing a cavity is a borescope inspection. Technicians drill small, non-disruptive holes into the mortar joints at strategic points around the property. A high-definition camera is then inserted into the void to capture visual proof of the cavity’s condition. This process reveals exactly what is happening behind the brickwork. It allows specialists to identify slumping, the presence of construction debris, or mineral wool that has become a saturated mass. Seeing the material directly is the only way to confirm its failure and plan for its safe removal.
Moving Beyond Surface-Level Diagnosis
Many “expert surveys” offered by general contractors often miss the complex structural causes of moisture ingress. They might overlook a bridged damp proof course or fail to account for the property’s specific geographical exposure zone. Expert dampness specialists use data-driven methods, including thermal imaging, to identify cold spots and saturated areas that are invisible to the naked eye. Thermal imaging provides a heat map of the building’s envelope, highlighting exactly where insulation is missing or where it’s holding water and conducting heat away from the home.
By combining visual borescope footage with thermal data, a specialist can provide a comprehensive overview of the building’s health. This methodical approach ensures that no hidden faults are left unaddressed. If your home is showing symptoms of moisture distress, you should arrange a professional cavity wall survey to obtain a clear, technical diagnosis before proceeding with any remedial work. This is a vital investment in the long-term health and value of your property.
Professional Insulation Extraction: The Permanent Solution
When the signs of damp from cavity wall insulation become undeniable, the only effective remedy is the complete removal of the failed material. Leaving saturated or degraded insulation within the wall void allows moisture to continue its transit from the external leaf to your internal living spaces. Professional extraction isn’t a “last resort” but a methodical, technical process designed to restore the property’s original moisture barrier. By returning the cavity to its intended state, you eliminate the source of the problem rather than merely masking the symptoms. This intervention is a vital investment in your home’s structural integrity and long-term asset health.
The Extraction Methodology
The process of cavity wall insulation removal is designed to be as non-disruptive as possible. Technicians begin by identifying strategic extraction points, typically at the base of the wall. Bricks are carefully removed to allow access for industrial vacuum equipment. To ensure every fragment of failed material is recovered, technicians use high-pressure compressed air to agitate and loosen slumped or compacted insulation. This technique ensures that even the most stubborn debris is cleared from corners and around wall ties.
- Strategic brick removal at the base of the wall creates clear extraction points.
- Compressed air agitation ensures that 100% of the material is loosened for removal.
- Industrial-grade vacuum systems capture all debris, preventing it from entering the home or garden.
- A “clean site” guarantee means that all masonry is repointed and the area is left in its original condition.
Long-Term Benefits of a Clear Cavity
Removing failed material does more than just stop the damp; it restores the property’s natural breathability. Once the cavity is clear, the internal walls can finally dry out through natural evaporation. This process is essential for preventing the further corrosion of wall ties, which we’ve identified as a major risk factor for structural cracking. Restoring the air gap also ensures that your home’s thermal performance is managed by the masonry itself, preventing the stagnant, humid conditions that lead to black mould and musty odours. It’s also critical to clear air bricks and check the damp proof course (DPC) for any remaining debris during this phase. By taking this proactive step, you protect your property’s market value and ensure a healthy, dry environment for the future. Our nationwide service provides the expertise needed to rectify poor industry workmanship and restore your home’s comfort permanently.
Restoring Your Home’s Structural Integrity
Addressing moisture issues in your property requires a methodical, data-driven approach. You now understand that failed insulation acts as a physical bridge for moisture, compromising the very cavity designed to protect your home. By identifying the specific signs of damp from cavity wall insulation, you’ve taken the first step toward a permanent technical solution. These faults require specialist intervention to prevent long-term wall tie corrosion and structural decay.
Our nationwide team of accredited technicians uses specialist borescope reporting to provide visual proof of your cavity’s condition. We employ non-disruptive extraction technology to ensure your property is restored without unnecessary mess or structural stress. You don’t have to live with the anxiety of hidden damage or persistent dampness. Book a Professional Cavity Survey and Protect Your Home Today to secure your building’s future health. Taking action now is a vital investment in your property’s value and your daily comfort.
Frequently Asked Questions
Can cavity wall insulation cause damp problems years after installation?
Yes, insulation can cause issues decades after it was first installed. Materials like urea-formaldehyde foam can shrink and degrade over time, while mineral wool can slump as it absorbs moisture from minor building defects. These changes create voids and moisture bridges that eventually lead to internal damage. Identifying the signs of damp from cavity wall insulation early is essential for preventing structural decay that often only becomes visible long after the initial installation.
Is it possible to fix damp insulation without removing it entirely?
No, it’s not possible to effectively fix or dry out insulation once it has become saturated or has slumped. Saturated material loses its thermal properties and acts as a permanent bridge for moisture to travel into your home. The only technical solution is a full extraction to restore the cavity’s natural airflow. Attempting to treat the symptoms with internal damp-proofing will only trap moisture within the masonry, leading to further structural issues.
How long does it take to extract failed cavity wall insulation?
A standard extraction for a semi-detached property usually takes between one and two days. Larger detached homes or properties with complex access requirements may take slightly longer. The process is efficient because it uses industrial vacuum technology to remove material through external extraction points. Our technicians work methodically to ensure the cavity is 100% clear before repointing the masonry, allowing the property to begin the drying process almost immediately.
What happens if I leave damp insulation inside my walls?
Leaving failed insulation inside your walls leads to progressive structural damage and health risks. The moisture held within the material accelerates the oxidation of steel wall ties, which can eventually cause the outer leaf of your home to become unstable. Internally, persistent dampness promotes the growth of toxic black mould and degrades plasterwork. Over time, the cost of repairing these secondary structural issues often far exceeds the cost of a professional extraction.
Will removing the insulation make my house colder and more expensive to heat?
Wet insulation actually conducts heat away from your home, making it feel colder than an empty cavity. Once the saturated material is removed, the “cold wall” effect is eliminated, and your internal masonry can finally dry out. While the air gap itself provides a level of thermal resistance, the primary benefit is the restoration of a dry, healthy environment. Most homeowners report that their rooms feel significantly more comfortable and easier to heat after the extraction.
How can I tell if my wall ties are failing due to damp insulation?
The most common sign of failing wall ties is horizontal cracking along the external mortar joints. This happens because rusting steel expands to several times its original thickness, forcing the brickwork apart. You might also notice a slight bulging of the external walls. However, these signs of damp from cavity wall insulation are often internal. A specialist borescope inspection is the only way to visually confirm the level of corrosion on the ties themselves.
Is the extraction process messy or disruptive to my daily life?
The extraction process is remarkably clean and involves zero disruption to your internal living space. All work is performed from the exterior of the property using industrial vacuum systems. As a nationwide specialist across the UK, we ensure that every site is left in pristine condition. We remove individual bricks at the base of the wall to create extraction points, which are carefully replaced and colour-matched. Your daily routine remains unaffected while we restore your home’s structural health.
Does home insurance typically cover the cost of insulation removal?
Home insurance coverage for insulation removal is highly dependent on your specific policy and the underlying cause of the dampness. Most standard policies are designed to cover sudden, accidental damage rather than gradual deterioration or issues arising from poor initial workmanship. It’s advisable to review your policy documents carefully. We provide detailed professional reports following our surveys, which can be essential evidence if you choose to discuss the matter with your insurance provider.
Recent Comments