

Your cavity wall insulation isn’t just a thermal barrier; it’s a structural component that, when compromised, acts as a bridge for moisture and a catalyst for wall tie corrosion. With nearly 75% of all UK properties featuring cavity walls, the integrity of this internal layer is vital for maintaining a dry, safe home. If the tops of your walls feel cold while the base remains warm, you’re likely witnessing a failure in your property’s thermal envelope. Understanding how to tell if cavity insulation is slumped is the first step in preventing long-term damage to your masonry.
It’s stressful to deal with persistent cold spots. These signs often point to a technical fault that prevents your home from meeting the 0.18 W/m²K U-value required by Part L building regulations. This guide explains the physical indicators of insulation settlement and the professional diagnostic steps required to verify if your barrier has failed. We’ll provide a clear path to confirming the issue and explain how our nationwide specialists restore your property’s health through specialist extraction.
Key Takeaways
- Identify physical indicators of slumping, including cold bands at the top of walls and condensation near ceiling junctions.
- Recognise the link between slumped insulation and wall tie corrosion, which can lead to cracked brickwork and structural instability.
- Learn how to tell if cavity insulation is slumped through specialist diagnostic methods like borescope inspections and thermal imaging surveys.
- Understand why industrial extraction is the only reliable way to clear the cavity and protect your home’s long-term health.
What is Slumped Cavity Insulation and Why Does it Happen?
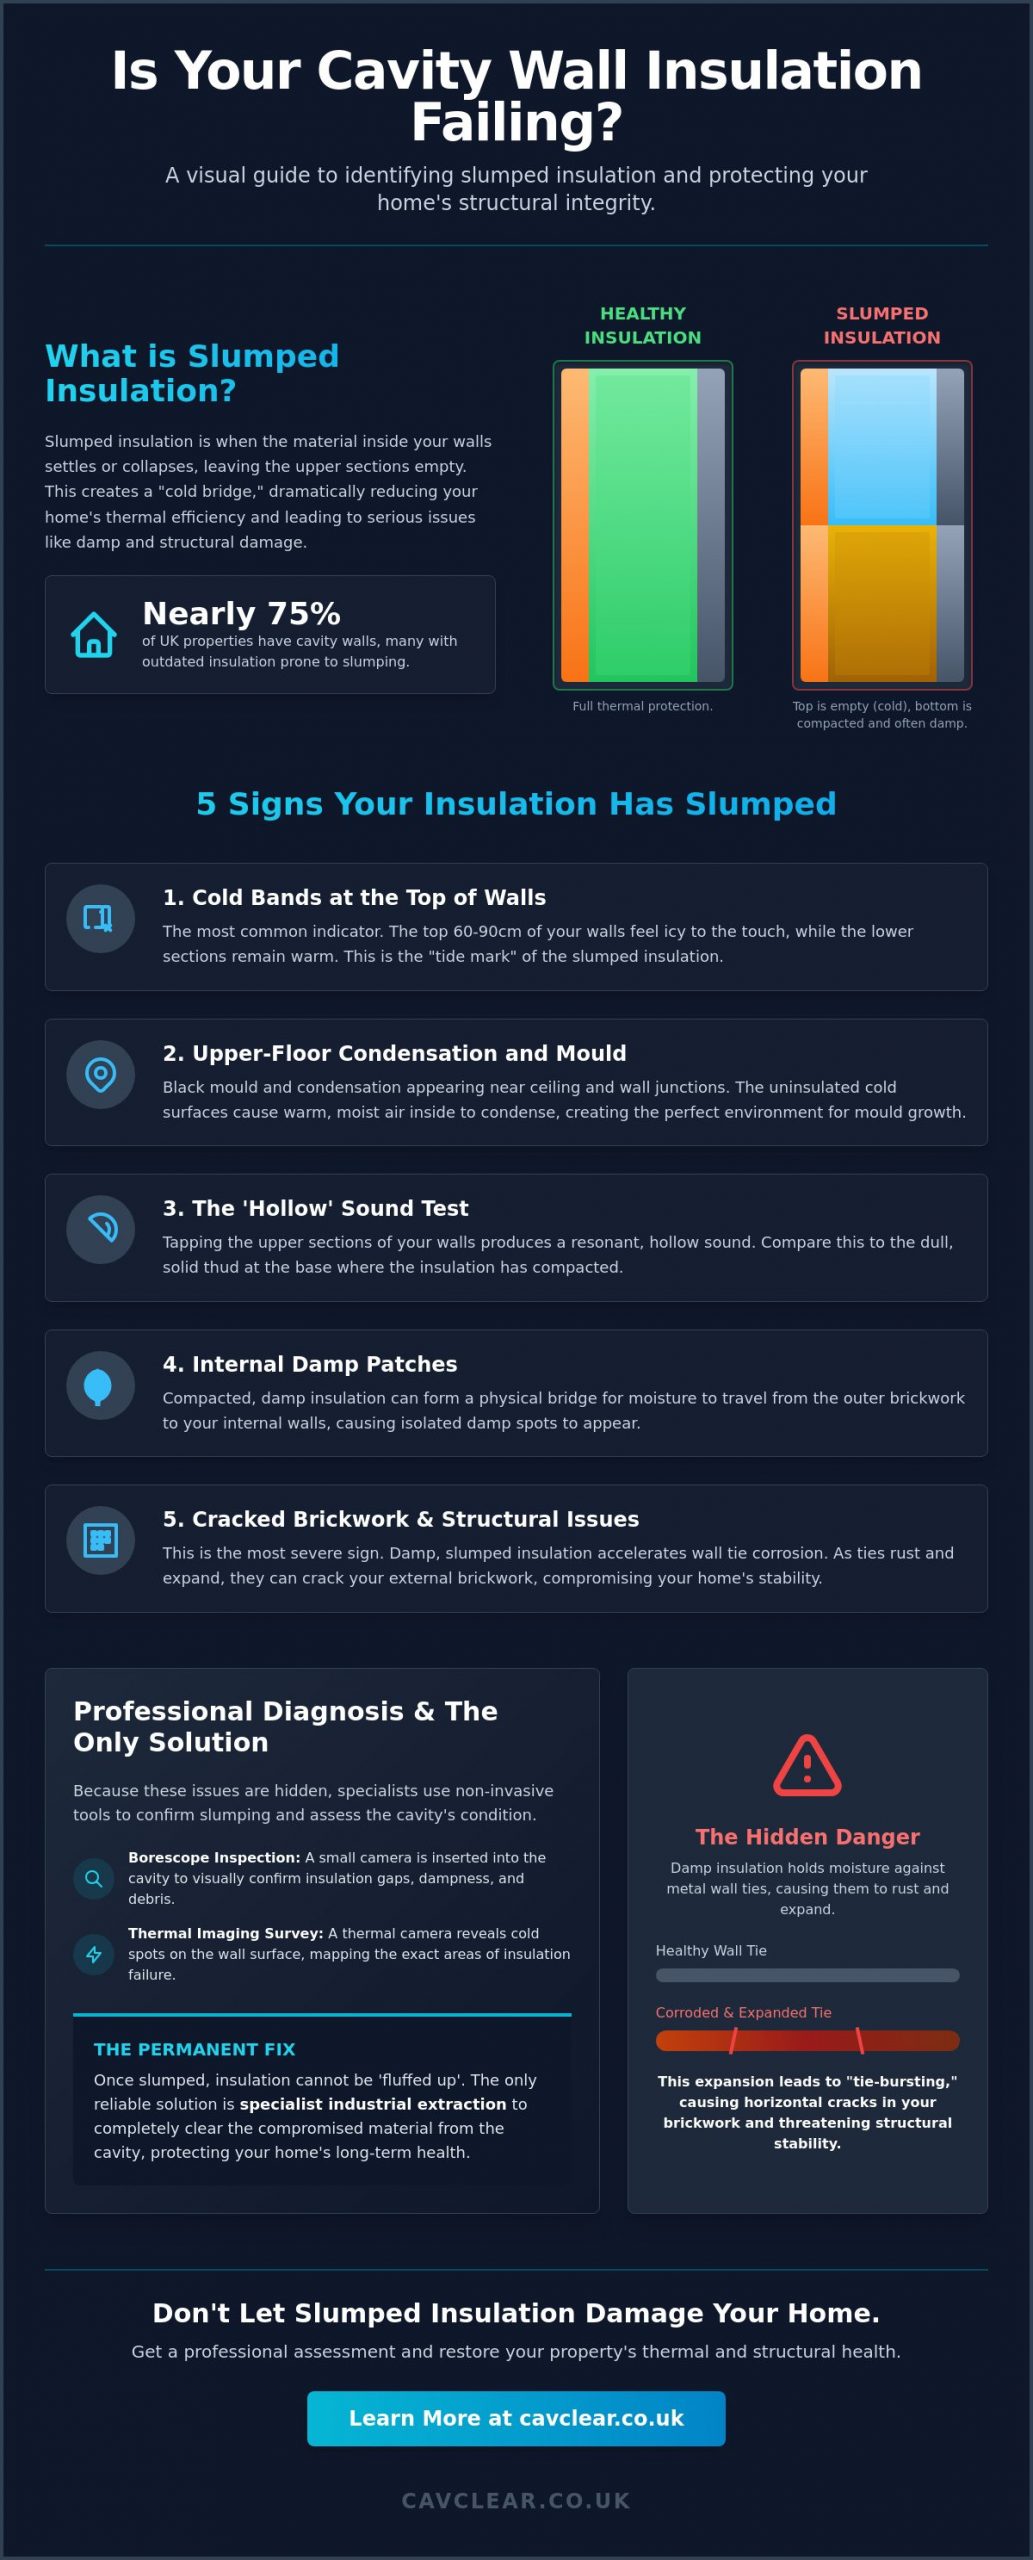
Slumped insulation refers to the physical settlement of insulating material towards the base of a wall cavity. This process leaves the upper sections of the property’s thermal envelope entirely empty. It creates a distinct “tide mark” effect where the lower half of a wall remains insulated while the top becomes a massive cold bridge. When this occurs, the property’s thermal efficiency drops significantly, often failing to reach the 0.18 W/m²K U-value required by modern building regulations. Identifying these physical changes is the first step in learning how to tell if cavity insulation is slumped before the damage becomes structural.
Several factors contribute to this failure. Gravity is the primary driver, but moisture and poor installation techniques act as catalysts. Early-generation urea-formaldehyde foams are particularly susceptible because they shrink and crack over time. Similarly, loose-fill mineral wool can settle if it wasn’t injected at the correct density to support its own weight. Understanding Slumping is essential for homeowners who want to protect their property’s structural integrity. Knowing how to tell if cavity insulation is slumped involves looking for these specific material failures and the environmental conditions that cause them.
The Role of Moisture in Insulation Settlement
Moisture ingress is the most common cause of rapid insulation failure. When wind-driven rain bypasses the outer leaf of brickwork, it saturates the insulating fibres. These water-saturated fibres become extremely heavy and lose their structural loft, leading to a total collapse of the material. This creates a dense, damp mass at the bottom of the cavity that holds moisture against the inner leaf. Once mineral wool slumps, it can never be ‘fluffed’ back up. This saturated debris then begins to compromise wall ties through oxidation, leading to “tie-bursting” and cracked external masonry.
Why Modern Standards Often Reveal Past Failures
Many of the 75% of UK properties with cavity walls received insulation under older standards that didn’t account for long-term compression. Geographic location plays a major role; homes in high-exposure zones experience more frequent moisture penetration, which accelerates the rate of settlement. Modern surveys often reveal these legacy issues where the original workmanship simply wasn’t sufficient for the building’s specific environment. Common reasons for this failure include:
- Inadequate injection patterns: Holes spaced too far apart leave “thin” spots that cannot support the weight of the material above.
- Material degradation: Older foam products naturally break down into dust and fragments over several decades.
- Mortar debris: Accumulation of mortar droppings (snots) inside the cavity can catch and weigh down fibres during the initial settlement phase.
- Humidity levels: Constant high humidity within the cavity softens certain fibre types, making them more prone to gravity-driven compaction.
Because these issues are hidden within the walls, they often go unnoticed until damp patches appear on the interior. Our nationwide specialists use non-invasive diagnostic tools to confirm these faults, ensuring that the structural health of the building is prioritized over temporary fixes.
5 Signs Your Cavity Wall Insulation Has Slumped
Detecting a failure inside a masonry wall requires a methodical approach. Homeowners often ask how to tell if cavity insulation is slumped when they notice specific patterns of thermal loss that don’t match typical heat dissipation. Unlike general degradation, slumping follows a top-down failure pattern. This phenomenon, often categorised as Wet Slump and Dry Slump, occurs when material either settles due to gravity or collapses under the weight of absorbed moisture. Recognising these five indicators can prevent long-term structural damage.
- Cold Bands: The most frequent sign is a temperature drop in the top 60cm to 90cm of a room. While the lower half of the wall remains warm, the top section feels icy to the touch.
- Upper-Floor Condensation: Black mould appearing specifically near the ceiling or wall-roof junctions indicates that the insulation has fallen away, leaving these areas uninsulated.
- The ‘Hollow’ Sound: If you tap the upper sections of your wall, it may produce a resonant, hollow sound compared to the dull thud at the base where the material has compacted.
- Internal Damp Patches: Slumped material creates a physical bridge between the outer and inner leaves. This allows moisture to bypass the cavity and manifest as damp spots on your plaster.
- Unexplained Draughts: When the upper cavity is empty, air moves expertly through the void. You might feel this air movement through floorboards or electrical sockets on upper floors.
If you suspect your property is losing heat through these voids, a specialist survey from CavClear can provide the technical confirmation needed to protect your home’s structural integrity.
Identifying the ‘Cold Bridge’ Pattern
The top of the house suffers first when insulation settles because gravity pulls the material downward. This creates a massive cold bridge where heat escapes rapidly. To understand why this void is so damaging, it’s helpful to review what is a cavity wall and how the air gap should ideally function. You can map these temperature variances yourself using a simple infrared thermometer. A variance of more than 3 or 4 degrees Celsius between the top and bottom of the same wall is a definitive indicator of settlement. This data provides clear evidence of how to tell if cavity insulation is slumped without needing to drill into the masonry immediately.
Visible Internal Wall Damage
Peeling wallpaper or flaking paint at the top of a room is a major red flag. This damage isn’t just “normal” condensation; it’s a symptom of a failed thermal barrier. When the wall surface temperature drops below the dew point due to missing insulation, moisture from the air instantly turns into liquid. This localized dampness is often more aggressive than general humidity issues. It specifically targets the corners where the wall meets the ceiling, leading to persistent mould growth that returns even after cleaning. Identifying this pattern early allows for a professional extraction before the moisture begins to corrode the internal wall ties.
The Hidden Danger: Slumping and Wall Tie Corrosion
While thermal loss is the most immediate concern for homeowners, the structural implications of failed insulation are far more severe. When material settles at the base of a wall, it creates a dense, moisture-retentive mass. This saturated debris holds water directly against the metal wall ties that bond your property’s inner and outer leaves together. Over time, this constant dampness leads to oxidation. As the metal ties rust, they expand to several times their original thickness. This physical expansion exerts immense pressure on the surrounding mortar, a phenomenon known as ‘tie-bursting’ that causes visible horizontal cracking in your external brickwork.
The danger is most acute at the base of the wall. This is where the highest volume of slumped material collects, meaning the lowest course of wall ties is often submerged in a wet slurry of degraded insulation. If your insulation has been wet for several years, a professional wall tie replacement is often necessary to restore the building’s stability. Research into UK housing stock highlights these risks. A Welsh Government report on insulation failures confirmed that improper installation in unsuitable environments leads to significant moisture-related defects. Understanding how to tell if cavity insulation is slumped is therefore a vital part of protecting your home’s long-term value and safety.
Moisture Bridging and Structural Integrity
The cavity was originally designed as an empty air gap to prevent water from the outer leaf reaching the inner leaf. Slumped material acts as a sponge, effectively bypassing this natural defence. Instead of moisture draining away through weep holes, it is trapped within the insulation, creating a permanent bridge for dampness. This environment accelerates the decay of structural components that were never intended to remain in constant contact with water. It’s a progressive issue; the more the material settles, the more moisture it can hold, and the faster the structural ties degrade.
Identifying External Signs of Tie Failure
Identifying the external signs of failure requires a methodical inspection of your masonry. You should look for horizontal cracks in the mortar beds, particularly at the lower levels where slumped insulation is most dense. These cracks often appear at regular intervals of roughly 450mm vertically and 900mm horizontally, which matches the typical placement of wall ties in UK homes. A specialist surveyor uses high-frequency metal detectors and borescope cameras to check for tie expansion and rust levels. This technical verification provides the final confirmation after you’ve identified the initial signs of how to tell if cavity insulation is slumped. Ignoring these external cracks can lead to the outer leaf of your property becoming unstable, posing a significant safety risk during high winds.
Professional Diagnosis: How a Specialist Verifies Slumping
While homeowner observations provide the initial clues, professional verification is required to confirm the extent of the failure and plan an effective extraction. Specialists use advanced diagnostic technology to peer inside the masonry without causing structural damage. This technical phase is the most accurate method regarding how to tell if cavity insulation is slumped, as it replaces guesswork with visual and thermal evidence. Our surveyors across the UK follow a methodical process to assess the material condition and the structural health of the wall ties.
The diagnostic toolkit includes moisture meter testing and cavity scoping. A moisture meter measures the specific dampness levels within the insulation material itself. If the readings show high saturation, the material has likely reached its “wet slump” phase, where it can no longer be salvaged. Scoping involves checking for internal obstructions like mortar ‘snots’ or construction debris. These obstructions often act as the initial anchor point for settlement, catching falling fibres and creating the dense blockages that lead to damp bridging.
The Borescope: The Only Way to Be Sure
A borescope inspection is the gold standard for verifying insulation settlement. Our specialists drill small, discreet 10mm holes into the mortar joints at strategic points across the elevation. By inserting a high-definition camera into these voids, the surveyor can visually confirm the exact level of the insulation. They look for clear settlement lines, large empty voids at the top of the cavity, and signs of material degradation like crumbling foam or matted wool. This non-invasive technique provides undeniable proof of failure and allows us to map the precise areas where extraction is necessary to restore the property’s thermal integrity.
Thermal Imaging Mapping
Thermal imaging surveys allow us to ‘see’ through the brickwork by detecting heat signatures on the wall surface. These surveys are most effective during the winter months, when the temperature difference between the heated interior and the cold exterior is at its peak. A heat map reveals insulation voids as dark, cold patches, providing a clear visual contrast against the warmer, insulated sections. This data is invaluable for insurers or prospective buyers who require documented proof of a failed thermal barrier. Because slumping is so often linked to moisture, we typically recommend a damp survey alongside thermal mapping to identify if the voids have already led to internal saturation.
Combining these diagnostic methods ensures that the underlying cause of the failure is identified before any remedial work begins. If your property is showing signs of thermal loss or damp, you should book a professional survey to receive a comprehensive technical report on your cavity’s condition.
The Solution: Why Extraction is the Only Permanent Fix
Once you’ve identified the warning signs and understood how to tell if cavity insulation is slumped, the focus must shift to a permanent remedy. Attempting to ‘top up’ settled insulation is a fundamental mistake that often worsens existing damp issues. Adding new material on top of a slumped, moisture-saturated mass only increases the weight and pressure at the base of the wall. This further compresses the existing debris, trapping even more moisture against the internal leaf and accelerating wall tie corrosion. Complete extraction is the only way to restore the property’s structural integrity and thermal health.
The average cost to remove cavity wall insulation typically ranges between £1,600 and £2,600, depending on the complexity and size of the property. For a standard semi-detached home, this investment ensures the removal of all degraded fibres or foam that are currently acting as a moisture bridge. By returning the wall to its original ’empty’ state, you eliminate the source of persistent damp and black mould. This process doesn’t just fix a thermal defect; it protects the long-term value of your home by allowing the masonry to breathe as it was originally designed to do.
Specialist Extraction Techniques
Our specialists use industrial-grade vacuums and high-pressure compressed air to clear the cavity. We employ a ‘bottom-up’ removal method, starting at the lowest point of the wall to ensure 100% of the settled debris is extracted. This systematic approach prevents material from becoming lodged behind wall ties or internal obstructions. DIY removal is impossible and dangerous; attempting to clear a cavity without specialist equipment can lead to structural instability or permanent blockages. For a detailed breakdown of the process, refer to our guide on cavity wall insulation removal.
Post-Extraction Property Health
Removing failed insulation restores the wall’s natural ventilation. In the UK’s climate, a clear air gap is often the best defence against penetrating damp, as it allows any moisture that bypasses the outer leaf to drain away harmlessly. Once the saturated material is gone, internal wall temperatures can stabilise, and the risk of ‘cold bridge’ condensation disappears. This restoration of the cavity’s function is a vital investment in your home’s future, ensuring a dry, safe, and healthy living environment for the long term. Our nationwide service provides the peace of mind that your property is being handled by accredited specialists who prioritise structural safety.
Protecting Your Home’s Structural Integrity
Slumped insulation is more than a heating problem; it’s a structural threat that compromises your wall ties and invites persistent damp. Recognising the “tide mark” of cold bands at the top of your rooms is the first step in understanding how to tell if cavity insulation is slumped. Once material settles at the base of the cavity, it creates a moisture bridge that bypasses your home’s natural defences. Leaving this saturated debris in place leads to oxidation and tie-bursting, which can eventually destabilise your external brickwork.
Professional extraction is the only permanent solution to restore your property’s thermal efficiency and air quality. Our accredited specialist technicians provide nationwide UK coverage, delivering comprehensive structural reports that identify the exact condition of your cavity. We use non-invasive diagnostic tools to verify failures before performing a clean, industrial-grade extraction. This methodical approach ensures your masonry is returned to its original, breathable state.
Book a Specialist Cavity Survey with CavClear Today to ensure your property remains dry, safe, and structurally sound for years to come. Taking action now prevents minor thermal loss from becoming a major structural repair.
Frequently Asked Questions
Can I just top up my slumped cavity wall insulation?
No, you should never attempt to top up insulation that has already settled. Adding new material on top of a compacted, moist base creates a dense “sandwich” that increases pressure on the lower sections of your walls. This practice traps moisture against the inner leaf and prevents the cavity from draining correctly. Full extraction is the only professional method that restores the wall’s intended air gap and thermal balance.
How long does it take for cavity wall insulation to slump?
Settlement often becomes noticeable within 10 to 15 years of installation, though environmental factors can accelerate this. Properties in high-exposure coastal regions often experience faster slumping due to persistent wind-driven rain saturating the fibres. Materials installed during the 1990s without modern density standards are particularly prone to gravity-driven settlement, leaving significant thermal voids at the top of the property.
Will slumped insulation cause damp at the bottom or top of my walls?
It typically causes thermal issues at the top and moisture issues at the bottom. The empty void at the top creates “cold bands” where condensation and black mould form because the wall fails to meet the 0.18 W/m²K U-value standard. Meanwhile, the dense, slumped mass at the base acts as a sponge, holding water against the internal masonry and leading to persistent penetrating damp.
Is it possible to fix slumped insulation without removing it all?
No, professional extraction of the entire cavity is the only permanent remedy. Partial fixes leave pockets of saturated debris that continue to hold moisture against your wall ties. Learning how to tell if cavity insulation is slumped helps you understand that the material has failed as a system. Clearing the entire void is necessary to restore natural ventilation and protect the structural integrity of your home.
How much does a professional borescope inspection cost in the UK?
While specific survey fees depend on the size of your property, this diagnostic service is a vital investment to avoid the higher cost of unnecessary work. A specialist uses high-definition cameras inserted through discreet 10mm holes to visually confirm the state of the cavity. This technical verification provides the facts needed to plan a precise extraction, ensuring you don’t pay for removals where other building defects are at fault.
What happens if I leave slumped insulation in my walls?
Leaving failed insulation leads to progressive structural damage and wall tie corrosion. Saturated material holds water against the metal ties, causing them to oxidise and expand to several times their original size. This expansion creates horizontal cracks in your mortar beds, which can eventually destabilise the outer leaf of your masonry. Your home also remains less energy efficient, failing to reach modern Part L building standards.
Does slumped insulation affect my home’s EPC rating?
Yes, failed insulation can negatively impact your Energy Performance Certificate (EPC) rating and your property’s market value. If an assessor identifies how to tell if cavity insulation is slumped during their inspection, they’ll record the property’s actual thermal performance rather than the original installation paperwork. This often results in a lower score, as the property is no longer benefiting from the thermal barrier intended during the initial installation.
Recent Comments