
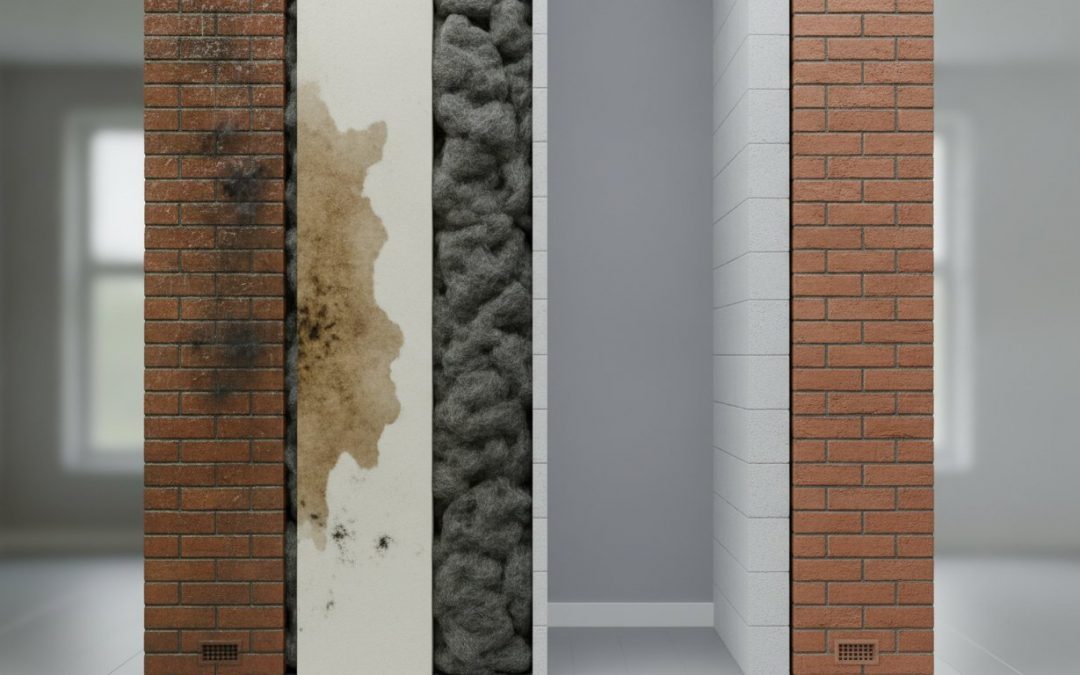
What if the material installed to keep your home warm is actually the reason your walls are soaking wet? For many homeowners across the UK, the discovery of mould from cavity wall insulation is a frustrating paradox that turns a supposed energy-saving measure into a structural nightmare. When insulation becomes saturated, it stops acting as a thermal barrier and starts functioning as a moisture bridge, pulling external dampness directly into your living space. This process bypasses your home’s natural defences, leading to the persistent black spots and damp patches that no amount of surface cleaning can fix.
You’ve likely tried scrubbing the corners or using dehumidifiers to mask that heavy, musty smell, yet the damp always returns. It’s exhausting to fight a battle against moisture when the root cause remains hidden deep inside your brickwork. This article explains exactly how defective material triggers these issues and how professional extraction can finally restore your property’s health. You’ll learn about the technical reasons for cavity failure and the methodical, non-disruptive steps required to return your home to a dry, comfortable state for the long term.
Key Takeaways
- Understand why moisture bridging occurs and how mould from cavity wall insulation is often a symptom of the cavity’s original drainage function being compromised.
- Learn to identify the specific patterns of damp and black mould that indicate insulation failure, such as patches occurring near voids or settled material.
- Discover why trapped moisture poses a serious threat to your home’s structural integrity by accelerating the corrosion of metal wall ties.
- See why a technical borescope survey is the only reliable way to visually confirm the condition of your insulation before proceeding with remedial work.
- Find out how professional cavity wall insulation extraction restores ventilation to your walls, allowing the property to dry out naturally and permanently.
Why Cavity Wall Insulation Can Lead to Damp and Mould
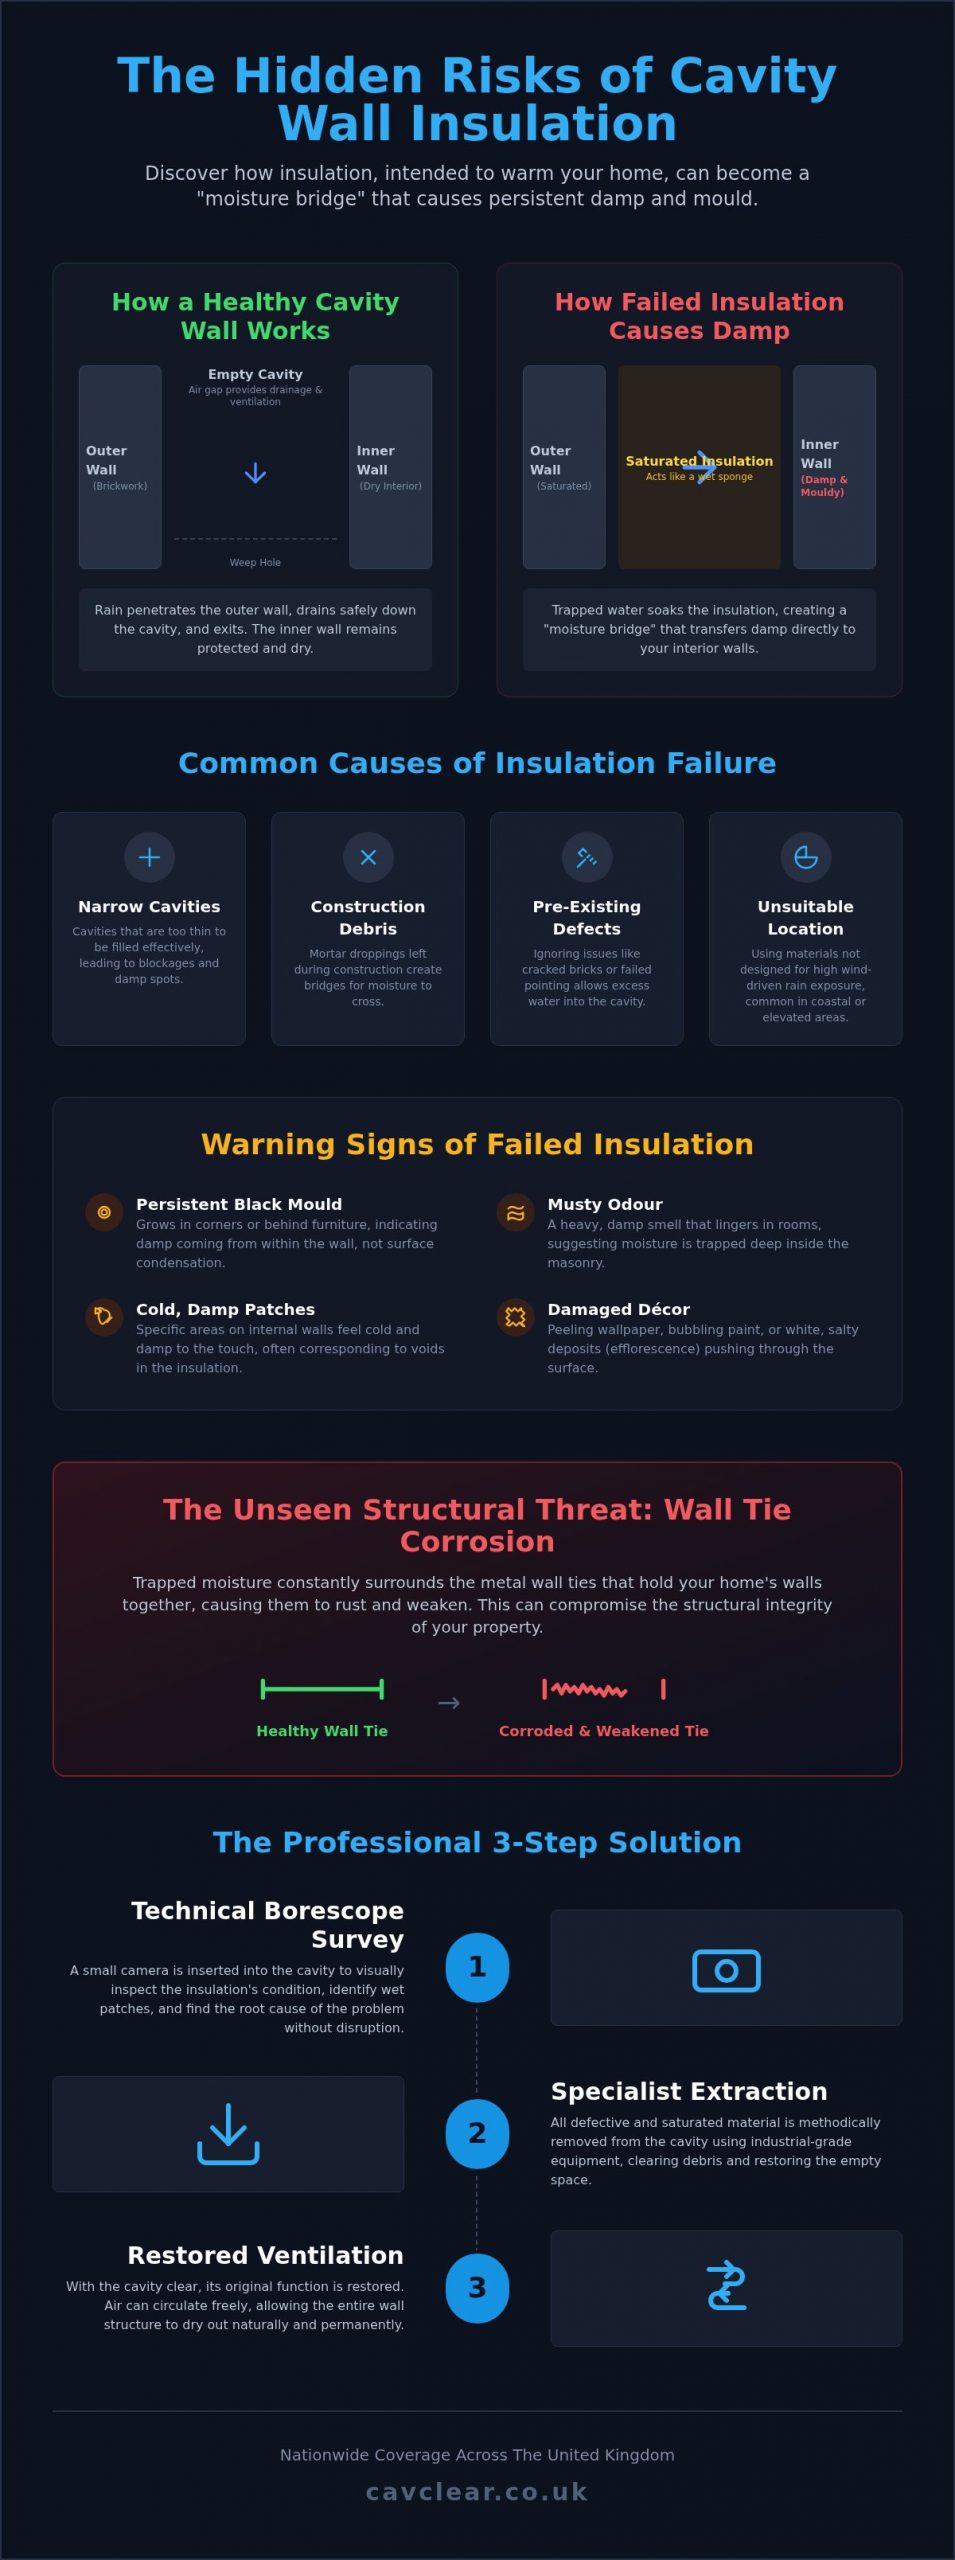
The fundamental design of a Cavity wall in the UK serves a specific structural purpose. It creates a dedicated drainage and ventilation zone between the external environment and your internal living space. This empty gap ensures that any water penetrating the outer leaf of masonry simply drops to the bottom and exits through weep holes, rather than reaching your plasterwork. When this space is retrofitted with insulation, that essential barrier is removed. Instead of a clear path for air and water, the cavity becomes packed with material that can trap moisture against the inner leaf. This creates a permanent damp problem.
Porous brickwork and failed pointing often exacerbate this problem. In many parts of the UK, especially coastal or elevated regions, wind-driven rain saturates the external masonry. Without an empty cavity, this water has nowhere to go but into the insulation material itself. Even products marketed as breathable often fail under these conditions. They cannot cope with the volume of water. Once the material becomes saturated, it loses its thermal properties and begins to actively transport liquid water across the gap. This is the primary catalyst for mould from cavity wall insulation, as the damp internal walls provide the perfect environment for fungal growth.
The Mechanism of Moisture Bridging
Rainwater naturally moves through the outer leaf of a property via capillary action. In a healthy wall cavity, this moisture evaporates or drains away harmlessly. However, when insulation is present, it creates a physical connection between the two walls. A moisture bridge is a physical link that bypasses the cavity’s protective gap. Saturated mineral wool or urea-formaldehyde foam acts like a sponge, holding water in a dark, unventilated space where it cannot dry out. This constant state of dampness eventually permeates the inner leaf, manifesting as cold spots and recurring black mould behind furniture or in room corners.
Common Installation Failures
Many instances of mould from cavity wall insulation stem from poor initial assessment. Cavities that are too narrow or those containing mortar snots, which are debris left over from construction, should never have been filled. These obstructions create localized points of contact where moisture crosses easily. Installers also frequently ignore existing structural issues like cracked bricks or blocked air bricks before pumping material into the walls. Using unsuitable materials in high-exposure zones is another frequent error that leads to long-term dampness. A professional survey is the only way to identify if these installation faults are currently compromising your property’s structural health.
Spotting the Warning Signs of Failed Wall Insulation
This emphasis on expert assessment and correct material choice is a global standard for preventing structural dampness. Reputable contractors like Polar Bear Spray Foam Inc prioritize these rigorous standards, ensuring that insulation systems are tailored to the specific needs of the building and its environment to avoid the pitfalls of moisture ingress.
Identifying the early indicators of failed insulation allows you to act before structural damage becomes irreversible. Unlike standard condensation, which often affects windows first, mould from cavity wall insulation typically manifests as distinct patches on internal wall surfaces. These patches often align with “voids” where insulation has settled or was never correctly installed. In these gaps, the wall remains significantly colder, creating a thermal bridge that attracts moisture. If you notice these patterns, a professional cavity wall survey is the best next step to confirm the cause.
You might notice black mould forming behind large furniture or in the corners of rooms, even when you keep windows open. This persistent growth is frequently accompanied by a heavy, musty odour that indicates deep-seated dampness within the masonry. As the moisture levels rise, your internal décor will suffer. You’ll see peeling wallpaper, bubbling plaster, or salt deposits pushing through the paintwork. These symptoms suggest the insulation is no longer providing a thermal benefit but is instead holding water against your home’s inner structure.
Distinguishing Insulation Damp from Condensation
It’s vital to separate insulation-related issues from simple lifestyle condensation. While condensation sits on the surface, dampness from faulty insulation originates from within the cavity. You can test this by comparing the temperature of the affected area to the rest of the room. If a specific patch is significantly colder than the surrounding wall, you’re likely dealing with a thermal bridge caused by wet or missing insulation. Surface cleaning provides only temporary relief. Without addressing the saturated material inside the cavity, spores will return within weeks because the underlying moisture remains.
External Indicators of Internal Problems
Your home’s exterior often provides clues to the state of the insulation. Look for cracked pointing or “spalling” bricks, where the brick face has flaked away due to expertze-thaw cycles in saturated masonry. Moss growth on specific areas of the wall also suggests that the brickwork is holding excessive moisture. Referencing the consumer guide to issues with cavity wall insulation can help you understand these physical symptoms better. Finally, inspect the original injection holes. If these were poorly sealed with mismatched mortar, they can act as entry points for rain, leading directly to the development of mould from cavity wall insulation.
The Structural Impact: Beyond Surface Mould and Damp Patches
While the visible presence of mould from cavity wall insulation is distressing, the hidden structural consequences are often more severe. When insulation material remains saturated, it creates a high-moisture environment that compromises the metallic components within your walls. This isn’t just about aesthetics; it’s about the long-term integrity of the building. Trapped water also facilitates the movement of hygroscopic salts from the brickwork into the internal plaster. These salts are problematic because they naturally absorb moisture from the air, ensuring that the walls remain damp to the touch even if you attempt to improve room ventilation.
The cumulative effect of this moisture can lead to the slow degradation of the masonry itself. Over time, the constant presence of water weakens the mortar joints and can lead to frost damage during winter months. This structural decay often goes unnoticed until significant repairs are required. Understanding the principles of Building damp-expert cavity walls is essential for any property owner, as it highlights why a clear, ventilated cavity is the best defence against structural failure.
Wall Tie Corrosion and Insulation
The presence of wet insulation significantly accelerates the corrosion of metal wall ties. These ties are essential for holding the inner and outer leaves of your property together. In a dry cavity, the protective coating on these ties lasts for decades. However, wet insulation creates a corrosive environment that strips this protection away, leading to rapid oxidation. As ties rust, they expand to several times their original size. This expansion forces the mortar joints apart, causing horizontal cracking or even bulging in the external masonry. Consequently, wall tie replacement often becomes a necessary remedial step to ensure the property remains structurally sound and retains its market value.
The Failure of Thermal Performance
Many homeowners find that their energy bills actually increase after experiencing insulation failure. This happens because water is a highly efficient conductor of heat. When insulation is dry, it traps air to prevent heat loss. When it’s wet, it performs the opposite function, drawing warmth away from the inner leaf and transferring it to the cold outer leaf. This is often referred to as the “refrigerator effect.” A saturated wall cavity effectively acts as a heat sink, making it nearly impossible to maintain a consistent temperature indoors. This thermal failure is a primary driver for the continued growth of mould from cavity wall insulation, as the internal wall surfaces never reach a temperature high enough to prevent condensation. Removing the defective material is the only way to break this cycle and restore the property’s intended energy efficiency.
Professional Solutions: From Technical Surveys to Insulation Extraction
Resolving the issue of mould from cavity wall insulation requires more than just superficial cleaning or improved ventilation. It demands a rigorous technical approach to identify why the cavity is failing and where the moisture is originating. A comprehensive damp survey is the essential first step in this process. This diagnostic stage ensures that we don’t just treat the symptoms, but instead identify the specific technical faults within the wall structure. Professional extraction is the only permanent solution for saturated material, as wet insulation cannot be “dried out” while trapped between masonry leaves.
The Technical Property Inspection
Our technicians use a suite of non-destructive tools to map the extent of the dampness. Moisture meters and thermal imaging cameras allow us to see cold spots and moisture concentrations that are invisible to the naked eye. The most critical tool in this process is the borescope camera. By inserting a small lens through existing mortar joints, we can visually verify the condition of the insulation without causing any disruption to your home. This allows us to pinpoint exactly where the material has slumped, where voids have formed, or where debris has created bridging points that transfer water to your internal walls. If you suspect your insulation is failing, you should book a professional cavity wall survey to confirm the internal condition of your masonry.
The Extraction Process Explained
The removal process is methodical and designed to restore the cavity to its original, ventilated state. We begin by removing specific bricks at the base of the property to create natural extraction points. Using high-pressure compressed air, our specialists loosen the compacted or saturated material from the top of the wall downwards. A powerful industrial vacuum system then draws the debris out through the extraction points. This method is clean and non-disruptive, ensuring that no dust or material enters your living space.
The final stage of the process involves a secondary borescope inspection. We don’t consider the job finished until we’ve verified that the cavity is 100% clear of all residual insulation and debris. Once the walls are empty, the internal masonry can finally begin to dry out naturally. This restoration of the cavity’s drainage function is the only way to ensure that mould from cavity wall insulation never returns. We then replace the bricks using matching mortar, leaving your property structurally sound and ready to recover its thermal integrity.
Restoring Your Home’s Health with Specialist Remedial Care
Reclaiming your home’s health starts with removing the failed material that is causing the problem. Returning the cavity to its original, empty state restores the building’s natural ventilation and drainage systems. This is the only way to stop the cycle of mould from cavity wall insulation permanently. It’s a methodical process that prioritises the long-term health of the masonry over temporary surface fixes. By clearing the moisture bridge, you allow the property to function as its architects originally intended, ensuring that the inner leaf remains protected from external environmental factors.
Homeowners often ask how long it takes for a wall to dry after cavity wall insulation removal. While the timeframe varies based on the saturation level and the property’s exposure, most walls show significant improvement within four to six months. During this period, the restored air flow within the cavity pulls residual moisture out of the inner leaf. In the UK’s damp climate, an empty cavity is often the safest choice for exposed homes because it provides a permanent buffer against wind-driven rain. This restoration of a healthy indoor environment is vital for your family’s respiratory health and overall comfort.
The CavClear Commitment to Property Integrity
Our commitment to your property’s future is reflected in our clean and non-disruptive methodology. We use specialized equipment to ensure every corner of the cavity is reached, rectifying the poor workmanship of original installers without compromising your home’s structural integrity. We provide detailed reporting at every stage, offering transparent advice on long-term property preservation. This professional approach turns a stressful repair into a vital investment in your home’s future, ensuring the asset is protected for years to come.
If you’re ready to resolve your damp issues for good, Book a Professional Damp and Mould Survey with CavClear today.
Securing Your Home’s Structural Future
Addressing mould from cavity wall insulation requires moving beyond surface-level cleaning and ventilation. As we’ve detailed, the presence of saturated material inside your walls creates a persistent moisture bridge that compromises both thermal efficiency and structural integrity. Ignoring these technical faults only leads to higher energy bills and potential wall tie failure. Acknowledging that these issues won’t resolve themselves is the first step toward reclaiming a dry, healthy living environment for your family.
CavClear provides nationwide service coverage across the entire UK, employing accredited technicians who specialise in permanent remedial solutions rather than temporary surface fixes. We provide detailed professional reports following a borescope inspection to ensure you understand the exact state of your property’s masonry. Restoring your home’s original ventilation is a vital investment in the asset’s long-term health and efficiency. To begin the process of clearing your walls and protecting your home’s future, Book a Professional Damp Survey with CavClear today. You can return your property to a comfortable, mould-expert state with the right expert guidance.
Frequently Asked Questions
Can cavity wall insulation really cause mould growth?
Yes, improperly installed or defective insulation can directly cause mould growth by creating a moisture bridge between the outer and inner walls. When the cavity is filled, the original drainage and ventilation gap is lost. If the material becomes saturated by wind-driven rain or porous brickwork, it holds water against the inner leaf. This creates the cold, damp conditions necessary for mould from cavity wall insulation to thrive on internal surfaces.
How do I know if my mould is caused by insulation or just condensation?
Condensation typically appears on cold surfaces like windows or in poorly ventilated areas across the whole room. In contrast, mould from cavity wall insulation often appears in specific patches that correspond to voids or slumped material within the wall. You can distinguish the two by checking wall temperatures; if a specific patch is significantly colder than the rest of the wall, it indicates a thermal bridge caused by failing insulation rather than simple lifestyle moisture.
Will removing the insulation stop the mould from coming back?
Removing the defective material is the only permanent way to stop the recurring moisture. Once the cavity is cleared and returned to its original ventilated state, the moisture bridge is broken. This allows the inner leaf of the property to dry out naturally. After the walls are dry and the internal surfaces are professionally sterilised to kill any remaining spores, the mould won’t return because the underlying cause of the dampness has been eliminated.
Is the insulation removal process messy or disruptive to my garden?
The extraction process is designed to be clean and non-disruptive to your property and garden. Specialists remove individual bricks at the base of the wall to create extraction points, using high-pressure air and industrial vacuums to draw out the material. All debris is contained within the vacuum system and removed from the site. We then replace the bricks using matching mortar, ensuring the structural integrity and appearance of your masonry remain intact throughout the project.
How long does it take for walls to dry out after the insulation is removed?
Drying times vary depending on the level of saturation and local weather conditions, but most UK properties see a significant improvement within four to six months. Once the material is extracted, air can circulate expertly within the cavity again, pulling residual moisture out of the masonry. It’s important to monitor the walls during this period and wait until they are fully dry before attempting any permanent internal redecoration or plaster repairs.
Can I just add more ventilation to fix the mould issue?
Adding internal ventilation or using dehumidifiers only treats the symptoms of the problem, not the cause. While extra airflow can temporarily reduce surface mould, it cannot dry out saturated insulation trapped deep within the cavity. As long as the wet material remains, it will continue to bridge moisture from the outside to the inside. Permanent resolution requires the total extraction of the failed insulation to restore the wall’s intended drainage and ventilation functions.
Does wet insulation affect the structural safety of my house?
Yes, wet insulation poses a serious risk to structural stability by accelerating the corrosion of metal wall ties. These ties are essential for holding the two leaves of your wall together. When insulation holds water against them, the metal can rust and expand, leading to horizontal cracking in the mortar and eventually bulging walls. Addressing the moisture issue early through professional extraction is a vital investment in preserving your property’s long-term safety and market value.
What is the cost of a professional survey to check my cavity insulation?
The cost of a professional survey depends on the size of the property and the complexity of the inspection required. A standard technical assessment involves using borescope cameras to visually verify the condition of the material inside your walls without causing damage. This diagnostic process is essential for confirming if your damp issues are caused by insulation failure. For an accurate quote tailored to your specific property, it’s best to contact a nationwide specialist directly.
Recent Comments