
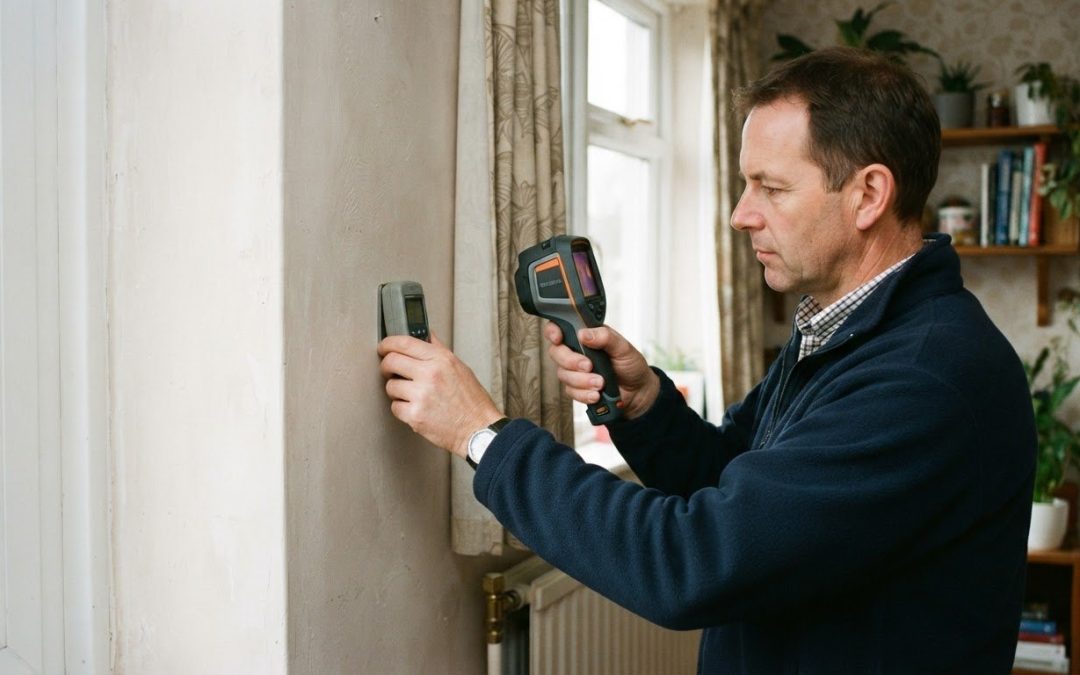
A cold patch in a thermal image isn’t proof of damp. The image shows differences in surface temperature, which can point to areas that need closer inspection. Understanding thermal imaging results in a damp report means reading those patterns alongside moisture readings, visible signs and the property’s construction.
It’s understandable to want a clear answer when a report highlights a cool wall or floor. But the same pattern may relate to moisture, heat loss, missing insulation, draughts or a thermal bridge. This article explains what thermal images can and can’t tell you, and how surveyors use other evidence to interpret them.
You’ll also see how misleading readings can arise and why context matters when interpreting thermal images alongside other evidence, rather than treating a cool area as a diagnosis. The aim is to help you make sense of the findings before deciding what further investigation may be appropriate.
Key Takeaways
- Read thermal images as temperature patterns, then weigh them alongside moisture readings, visible signs and building details.
- Learn why reflections, draughts, insulation gaps and thermal bridges can create cold spots that need careful interpretation.
- Understand how camera settings and nearby objects can affect the temperatures shown in an image.
- See when unusual patterns may justify a closer look at cavity wall insulation or wall ties.
- Find out how CavClear’s cavity wall surveys, wall tie surveys and cavity wall insulation removal can help address relevant findings.
What Is a Thermal Imaging Survey?
A thermal imaging survey maps surface temperature differences across walls, ceilings and other building elements. Understanding thermal imaging results in a damp report means treating cold patterns as clues, then comparing them with moisture readings and visible evidence.
Reading Temperature Patterns
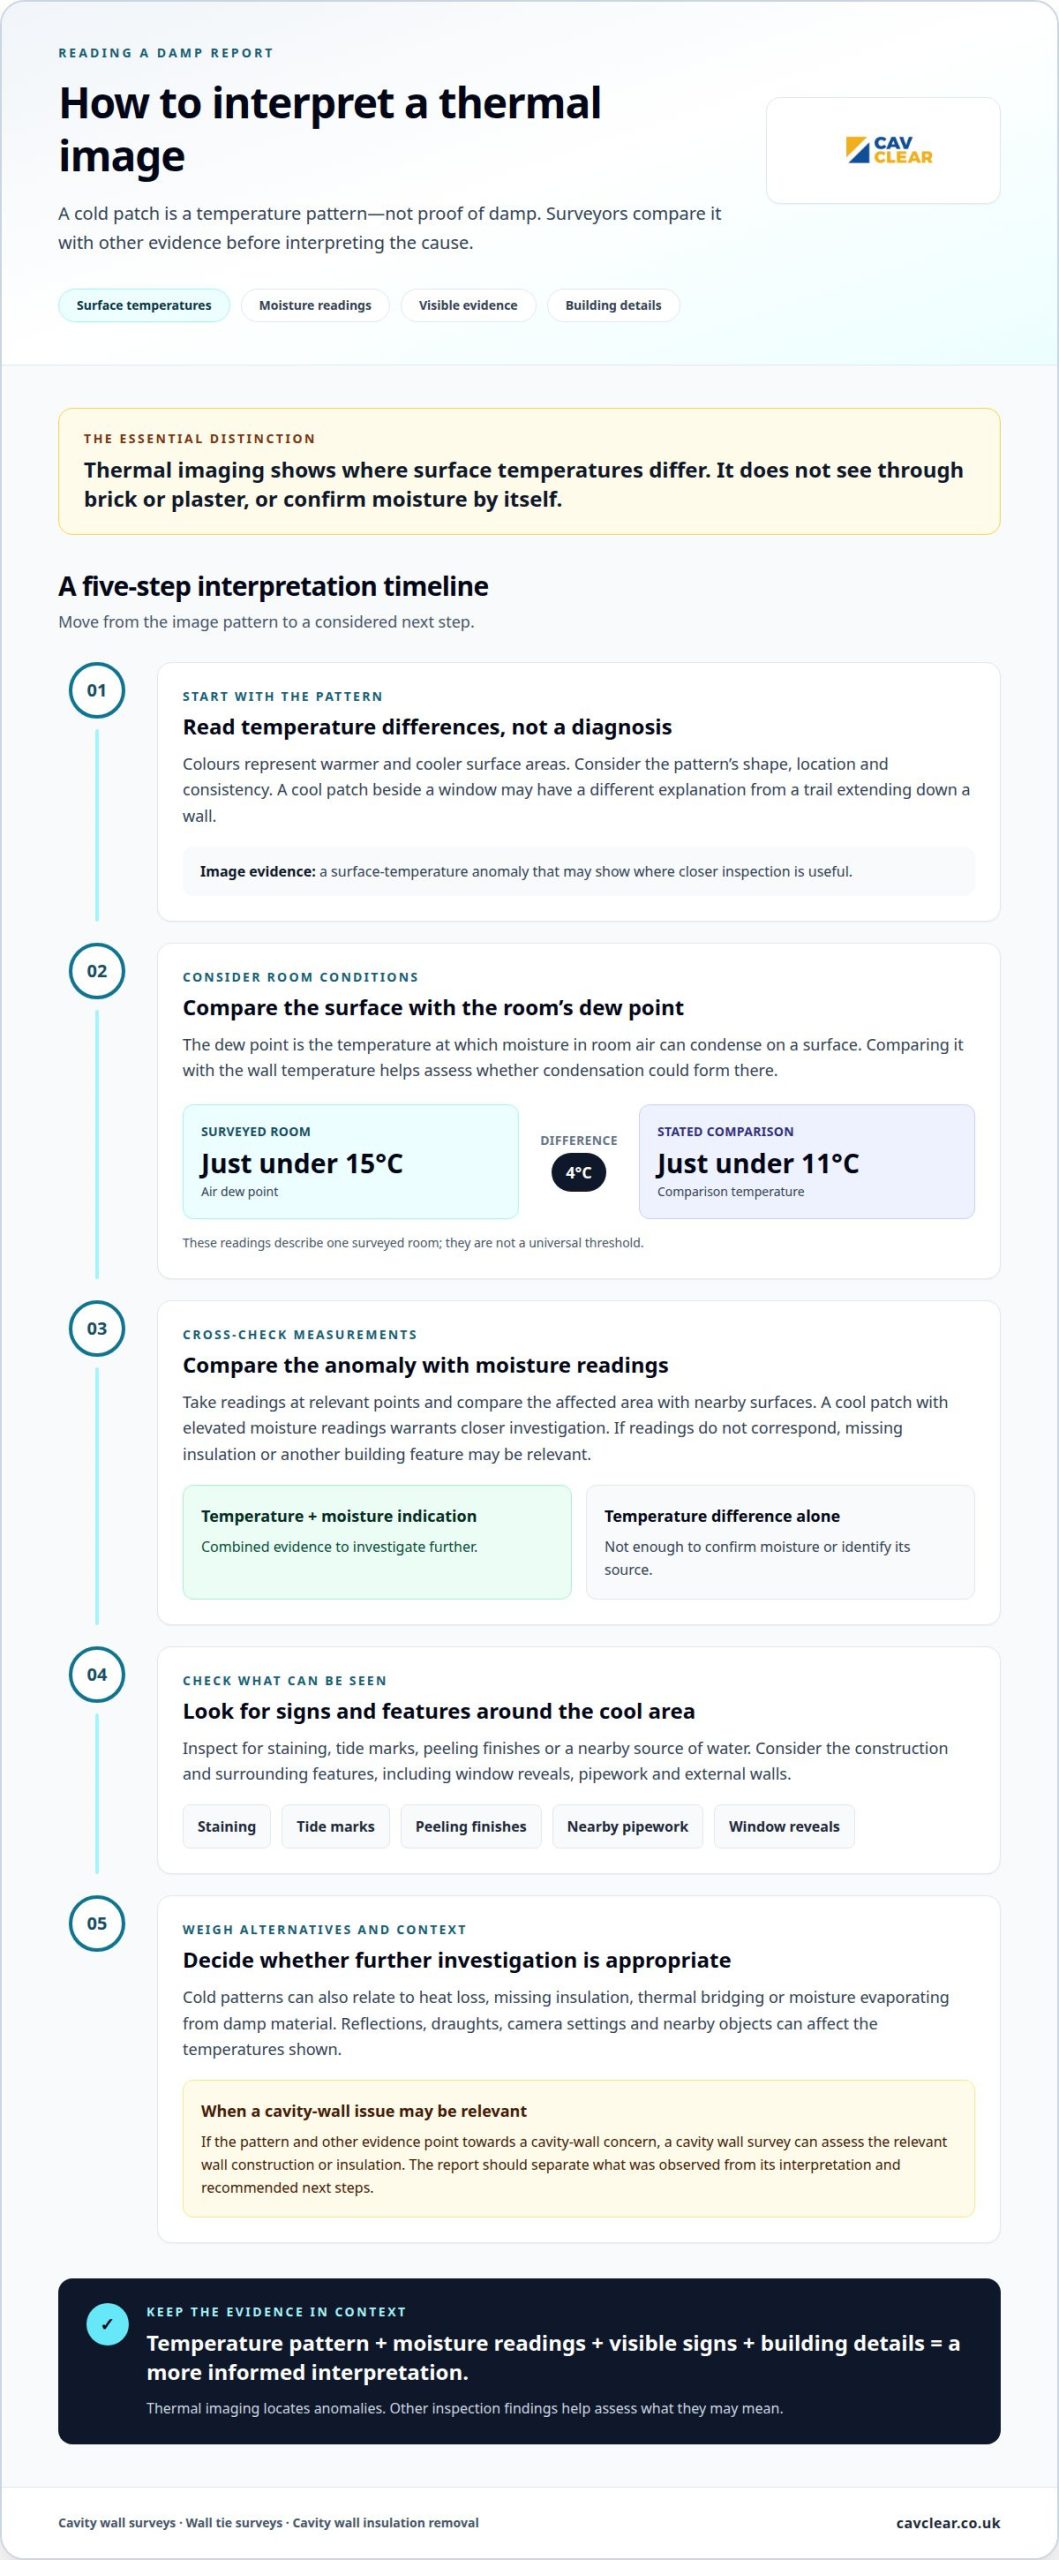
A thermal image displays variations in surface temperature, with colours representing warmer and cooler areas. In a building investigation, the surveyor considers each pattern’s shape, location and consistency. A cold patch beside a window may have a different explanation from a trail extending down a wall. These distinctions help identify where closer inspection could inform repair planning.
Relating Surface Temperatures to Dew Point
The dew point is the temperature at which moisture in room air can condense on a surface. Comparing a wall’s temperature with the room’s dew point helps assess whether condensation could form there. In one surveyed room, the air’s dew point was just under 15°C, while the stated comparison temperature was just under 11°C, a difference of 4°C. Those readings describe that room, not a universal threshold.
What temperature patterns suggest condensation, leaks or rising damp? A cool area at or below the room’s dew point may support concern about condensation, while a cold trail can prompt investigation for a leak. A lower-wall anomaly may warrant checking for rising damp, but its position alone cannot establish the cause.
Interpreting Cold Spots
A cold spot is a surface area with a lower temperature than nearby areas. It may reflect heat loss through a window reveal, roof or wall, or moisture evaporating from damp material. Missing insulation and thermal bridging can also produce cold patterns. Because these causes can look similar on images, surveyors compare the anomaly with building details and other evidence before interpreting it.
What does a thermal imaging damp survey cost in the UK? There is no single figure; the price depends on the property and the survey requirements.
For repair planning, a report should distinguish observed temperatures from possible explanations and recommended next steps. A cool patch supported by elevated moisture readings and visible staining presents different evidence from an isolated temperature difference. Further investigation can help identify the source and guide suitable remedial work.
Thermal imaging is non-invasive, but it records surface temperatures rather than seeing through brick or plaster. A temperature drop of half a degree can be enough for condensation to start forming, but context still matters. Surveyors interpret the image alongside room conditions, moisture readings and inspection findings before assessing the likely source.
Using moisture readings and visual evidence alongside thermal imaging
A thermal image identifies surface-temperature patterns, while inspection and moisture measurements help assess their possible causes. Comparing these findings gives a clearer picture than relying on the image alone.
Combining Thermal Images with Moisture Readings
Combining thermal images with moisture readings means checking a temperature anomaly against measurements taken at relevant points. If a cool patch on plaster also has elevated moisture readings, the combined evidence warrants closer investigation. A cold area with no corresponding moisture indication may instead relate to missing insulation or another building feature. Comparing affected and nearby areas helps put the readings into context.
Thermal imaging detects moisture indirectly: evaporating moisture can cool a surface, creating a cooler pattern against surrounding areas. A camera records surface temperatures, not water content behind a wall or ceiling. A thermal anomaly may warrant further investigation, but the image alone does not confirm moisture or its source.
Confirming Suspected Damp
Confirming suspected damp involves comparing meter readings with the thermal image, visible signs and construction details. An inspector may check the cooler area for staining, tide marks, peeling finishes or a nearby source of water. Measurements at the anomaly and adjacent surfaces help show whether the reading forms a consistent pattern or is isolated.
What other tests should accompany thermal imaging in a damp survey? A moisture meter, visual inspection and, where appropriate, deep wall probes can help assess the area. The surveyor also considers building materials and features such as window reveals, pipework and external walls.
How accurate are thermal imaging surveys for diagnosing damp in UK homes? They can locate temperature anomalies, but they do not diagnose damp on their own. Accuracy depends on interpreting images alongside moisture readings, inspection findings and property details, including insulation and construction.
For example, a cool patch beneath a ceiling pipe is more significant if inspection finds staining and moisture readings support the same location. By contrast, cold areas around a window with no visible damp may point towards a thermal bridge. A report should distinguish what the surveyor observed from their interpretation and recommended next steps.
Where patterns suggest a cavity-wall issue, further inspection can help establish whether the wall construction or insulation needs investigation. A cavity wall survey can assess relevant cavity-wall concerns alongside the other evidence.
False positives from reflections, draughts and thermal bridges
A cold pattern can result from heat movement or camera conditions, not only moisture. Identifying these alternatives helps prevent a thermal image from being mistaken for a damp diagnosis.
Distinguishing Damp from Heat Loss
Distinguishing damp from heat loss means comparing a cold area’s pattern with the building’s construction and other evidence. This matters because missing insulation, air leakage and moisture can all create cooler surfaces. A narrow cold line beside a floor junction may follow a structural bridge, while a damp-related anomaly may align with a leak or visible staining. Moisture measurements and inspection help assess these possibilities.
Reflections can also affect the pattern shown by a thermal camera. A shiny surface, such as polished metal, may reflect nearby heat rather than accurately show its own surface temperature. A radiator or sunlit object reflected in a surface can therefore make an area appear warmer or colder than expected. The surveyor considers the material, viewing angle and nearby heat sources before interpreting the image.
Identifying Insulation Gaps and Cold Bridging
An insulation gap is a section where heat passes through more readily, while a thermal bridge is a structural junction that transfers heat. Both can create cooler patterns without indicating damp. This distinction matters around window reveals, wall-floor junctions and roof edges, where changes in materials can produce consistent cold lines. The location and shape of each pattern help guide closer inspection.
Draughts create another misleading pattern. Air entering around a window frame, door or service opening can cool nearby surfaces, forming streaks that may resemble moisture-related anomalies. A surveyor can compare the cold area with openings and the direction of airflow, then consider whether the pattern follows a likely air path. This context helps assess whether heat loss, rather than damp, better explains the image.
Survey conditions matter too. Heating patterns, recent sunlight and changing weather can influence surface temperatures, so images need to be considered alongside the conditions during inspection. For example, a wall warmed by direct sun may show a different pattern from a shaded wall. A report should explain what the image highlights, distinguish observation from interpretation, and recommend further moisture checks where other evidence supports them.
When cold patterns appear in several locations, their relationship to structural details can be informative. Repeated lines at junctions may point towards thermal bridging, while an isolated patch near pipework may prompt a closer look for a leak. Neither pattern proves a cause on its own. Comparing the thermal image with the wall surface, room features and inspection findings helps avoid mistaking a heat-flow issue for moisture.
Thermal camera emissivity and reflected temperature adjustments
An infrared camera detects radiation emitted by surfaces and displays temperature differences as image colours. Emissivity describes how a surface emits that radiation, so the camera’s emissivity setting affects the temperature it reports. A setting suited to plaster may not suit reflective metal, making accurate adjustment important when interpreting a wall or ceiling image.
Reflected temperature is another consideration. A shiny surface can reflect heat from a radiator or another object, so the camera may record a pattern influenced by that reflection. For example, a metal fitting beside a warm radiator could appear warmer than the surrounding wall. The surveyor considers the surface material, viewing angle and nearby heat sources when assessing the image.
Furniture and stored items can change the temperature pattern too. A wardrobe against an external wall can limit airflow and alter the wall’s surface temperature behind it. Boxes stacked against a wall may also hide part of the surface from inspection. Those areas can appear cooler or warmer than exposed sections, so the image needs to be interpreted with the room layout in mind.
Reliable thermal imaging needs suitable conditions and preparation. The indoor-to-outdoor temperature difference should be at least 10°C during the survey, and the external temperature should not change significantly during the 24 hours before it. Direct sunlight should not fall on external walls during the survey. Closing windows and doors, briefly running the heating and keeping room access clear also support useful images.
These conditions help the camera highlight patterns linked to heat loss, insulation gaps or thermal bridging. They do not make every temperature difference evidence of damp. For instance, a cool section behind a stored item may reflect restricted airflow, while a cold line at a structural junction may point towards bridging. A moisture reading and visual inspection help assess whether moisture is also present.
In a damp report, useful interpretation separates the camera’s displayed temperature from the likely explanation. The report can note the surface, its surroundings and any reflective material or furniture affecting the reading. This makes the image easier to compare with inspection findings and other measurements, helping prevent a misleading pattern from prompting unnecessary repairs.
Connecting thermal imaging findings to cavity wall issues
Thermal patterns can help identify areas for closer cavity-wall investigation, but they cannot reveal cavity contents or wall-tie condition directly. Their value lies in comparing cold spots with the building’s visible condition and other inspection findings.
A Surrey survey of a 1930s semi-detached property identified missing cavity wall insulation and cold bridging around window frames. The thermal image showed temperature differences that directed attention to those areas. It did not, by itself, establish damp or explain the full condition of the cavity.
Cold spots in unexpected locations can raise questions about insulation performance, especially when they appear across a wall rather than only at a structural junction. A surveyor can compare those patterns with visible plaster condition, moisture readings and the wall’s construction. If evidence points towards a cavity issue, a cavity wall survey can investigate further.
Moisture-related patterns also need context. Wet insulation may be a concern where cold patches coincide with damp signs inside, but cold areas can also result from missing insulation or bridging. Heating use, external weather and wall construction affect the image. A report should explain which findings are visible, which are interpretations, and what further investigation could clarify.
Wall ties present a different diagnostic question. A thermal camera does not show whether metal ties are corroded or secure inside a cavity. However, visible cracking or movement in masonry may warrant a separate wall-tie investigation. Thermal patterns can highlight areas of concern, while inspection assesses the masonry and the condition of wall ties.
For a property buyer, this distinction can shape the next decision. A cold patch alone is not a repair specification. The report should identify the location, describe the observed pattern and link it to supporting evidence, such as moisture readings, visible cracking or insulation concerns. That makes it clearer whether further cavity-wall investigation is appropriate before repair decisions are made.
In practice, the surveyor records the thermal anomaly, then compares it with the wall’s internal and external condition. They consider whether the pattern follows a window reveal, appears across the cavity wall or aligns with visible masonry cracking. This helps distinguish possible insulation defects from structural concerns and damp indicators.
For the Surrey example, the key takeaway is that thermal imaging helped locate missing insulation and cold bridging, while further assessment was needed to establish their significance. The same principle applies elsewhere: use the image to target investigation, then base remedial decisions on the complete evidence.
CavClear
CavClear can help when a thermal imaging report raises questions about cavity walls, insulation or masonry movement. A cold pattern is a reason to investigate, not a diagnosis by itself. Consider the image alongside the property’s construction, visible condition and any moisture readings, then identify whether a cavity wall survey or wall tie survey is relevant.
Where damp concerns may relate to defective or incorrectly installed cavity wall insulation, CavClear carries out cavity wall surveys and cavity wall insulation removal. A survey investigates the cavity-wall concern and informs recommendations based on the findings. Removal is relevant when a professional survey confirms defective insulation or another need for removal, not simply because a thermal image shows a cold area.
Thermal patterns do not show the condition of wall ties inside a cavity. If the report also notes cracking or signs of masonry movement, a wall tie survey can investigate whether ties need attention. Where failing ties are identified, wall tie replacement addresses that specific issue. Keeping insulation concerns and possible tie problems distinct helps ensure each finding is considered appropriately.
For a homeowner, buyer or property professional, a useful report should make its observations and recommendations clear. Share the relevant thermal images and damp report when discussing a suspected cavity-wall problem. These materials can focus attention on the locations shown, visible signs and measurements already recorded, without treating one image as proof of a particular defect.
CavClear’s work centres on cavity-wall inspection and remedial needs. Cavity wall surveys can investigate concerns about the cavity or its insulation, while wall tie surveys focus on the ties and related masonry condition. If defective insulation is identified, cavity wall insulation removal may be appropriate; if failing ties are found, wall tie replacement may be recommended. The findings guide which service fits the issue.
If a thermal imaging report has raised concerns about cavity insulation or wall ties, contact CavClear to discuss the property and the findings.
Use the report to guide your next step
Understanding thermal imaging results in a damp report is most useful when it helps define what needs closer attention. Keep the report, images and any moisture readings together so the locations and observations can be considered as a whole. If the findings raise concerns about cavity insulation or wall stability, focus the next discussion on those specific areas rather than treating a temperature pattern as a repair instruction.
CavClear carries out cavity wall insulation removal, wall tie surveys and wall tie replacement nationwide across the UK. These services address different cavity-wall concerns, so the relevant next step depends on what an inspection identifies. A clear account of the reported pattern and any visible signs can help frame the discussion and support decisions about further investigation.
Take a measured approach. Understanding what the image can show, and what it cannot establish alone, helps keep attention on the property’s actual condition and long-term integrity. For a practical discussion of the report and relevant cavity-wall concerns, contact CavClear about your damp report.
Frequently Asked Questions
What should a professional thermal damp report include?
A professional report should record the inspected areas, visible conditions, thermal images, relevant moisture readings and the surveyor’s interpretation. It should distinguish observations from possible causes and recommendations. For example, a cool patch near a pipe should be located clearly and described separately from any conclusion about a leak. This structure helps readers understand what was seen, what it may indicate and what further investigation could clarify.
What do different colours in a thermal imaging damp report mean?
Colours represent temperature ranges selected for the thermal image, not categories such as “damp” or “dry”. A blue or purple patch generally indicates a cooler surface than a yellow or red area in that image, but the palette can vary between cameras and settings. Compare the scale or temperature key shown with the image, and read the colours in relation to nearby surfaces and recorded measurements.
Can a thermal camera confirm damp, or only indicate temperature differences?
A thermal camera indicates surface-temperature differences; it does not directly measure moisture within a wall. A cooler section of plaster may result from moisture, but a draught, insulation gap or structural junction can create a similar pattern. For example, a cold patch beside a window needs assessment alongside the wall’s condition and moisture measurements before the report can support a damp-related conclusion.
What should a UK damp report include when it uses thermal images?
The report should identify where each image was taken and explain the relevant room and inspection conditions. A useful entry might specify an external wall in a bedroom, note that a wardrobe restricted access, and state whether the image shows a localised anomaly or a broader pattern. It should also connect each image to the surveyor’s observations and any recommended follow-up, rather than leaving colours unexplained.
What steps should homeowners take after thermal imaging identifies a suspected damp area?
Keep the report and image together, note the exact room and wall, and record any changes such as new staining or peeling paint. Avoid arranging disruptive repairs based on a colour pattern alone. If the report recommends follow-up, make sure the relevant area can be accessed and share details of nearby plumbing, previous repairs or recurring damp signs during the inspection.
What are the risks of misinterpreting thermal images in a damp report?
Misreading a cold pattern as damp may lead to unnecessary work while the real cause, such as a draught or missing insulation, remains unresolved. Treating a moisture-related anomaly as ordinary heat loss can also delay investigating a leak or cavity-wall problem. A report that separates measured conditions from interpretation helps avoid premature repair decisions and keeps follow-up focused on the evidence.
Recent Comments