
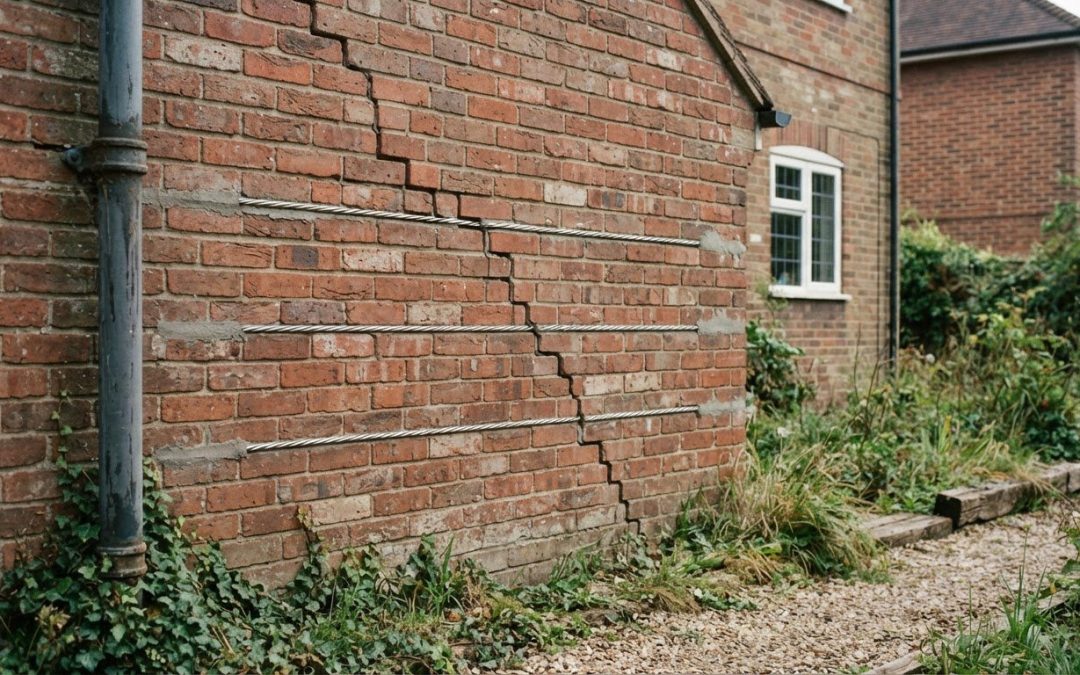
A visible crack doesn’t automatically mean brickwork needs rebuilding. For brickwork crack stitching, helical bars are installed across cracks in mortar joints to reinforce the masonry and help limit further movement, once the cause of the cracking has been assessed.
It’s understandable to want a repair that restores stability without replacing sound masonry unnecessarily. Helical bars are high-strength, twisted stainless-steel rods bedded in grout within mortar joints. They help distribute forces across a cracked area.
This guide explains how helical bars are used for brickwork crack stitching and why the underlying cause matters before reinforcement begins. It also covers how professionals install and encapsulate the bars, what affects the finished appearance, and how repointing can help the repaired joints blend with the surrounding brickwork.
Key Takeaways
- Helical bars reinforce cracked masonry by spanning cracks through mortar bed joints and helping redistribute loads.
- Crack stitching may suit walls that remain largely sound but need reinforcement; the cause of cracking should be assessed first.
- Repair quality depends on suitable bar placement, grout bonding and a mortar finish that works with the existing masonry.
- Where movement is ongoing or the underlying cause remains unresolved, reinforcement alone may not address the problem.
- Bar diameter and embedment depend on the masonry, crack pattern and repair design, rather than a single size fitting every job.
What Are Helical Bars?
Helical bars are twisted stainless-steel rods used to reinforce cracked masonry. In crack stitching, a specialist beds them in mortar joints across a crack to help redistribute loads through the wall.
Helical Bars as Masonry Reinforcement
Helical bars bridge a crack and transfer tensile forces into sound material on either side, reinforcing the masonry. Their twisted profile helps them grip the grout and surrounding mortar, connecting the damaged area across the wall.
This approach can suit buildings where the masonry is largely sound but needs local reinforcement. It targets the affected section rather than replacing all the surrounding brickwork. The cause of cracking still matters: reinforcement alone will not resolve movement affecting the wall.
Crack Stitching Across Bed Joints
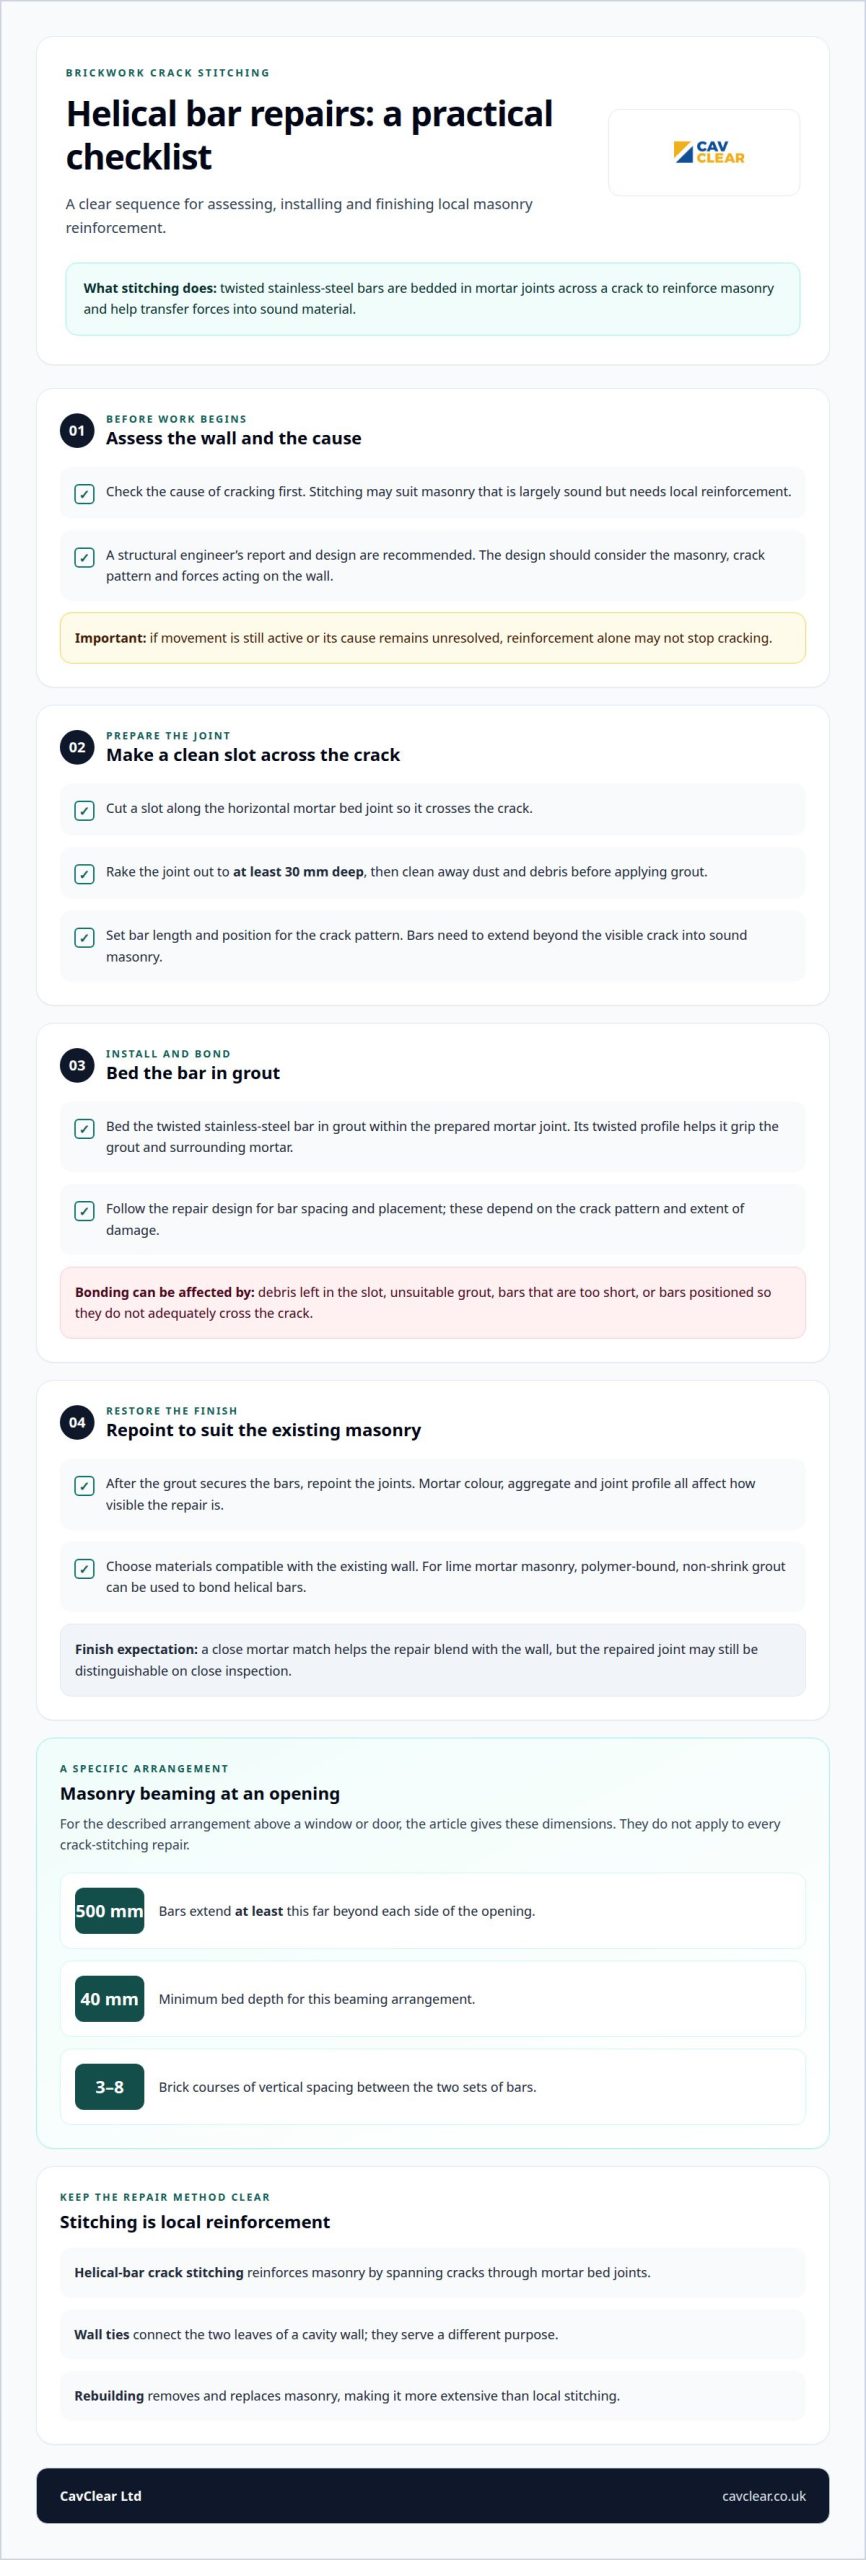
Crack stitching places helical bars in slots cut along horizontal mortar bed joints, crossing the crack. The joint is raked out to at least 30 mm deep, then cleaned to remove dust and debris before grout is applied.
The specialist beds the bar in grout and finishes the joint to suit the existing masonry. Bar spacing and placement depend on the crack pattern and extent of damage. The bars must extend beyond the visible crack into sound masonry to secure the repair.
Crack stitching is the method; helical bars are the reinforcement used. Wall ties serve a different purpose: they connect the two leaves of a cavity wall. Rebuilding removes and replaces masonry, making it more extensive than local stitching. The wall’s condition helps determine which approach is suitable.
A structural engineer’s report and design are recommended before helical bar repairs. The design should account for the masonry, crack pattern and forces acting on the wall. This helps determine whether stitching is appropriate or whether additional measures, such as anchors or tie bars, are needed.
Incorrect installation can leave bars poorly bonded, too short or positioned so they do not cross the crack adequately. Unsuitable grout or debris in the slot can also affect bonding. If the cause of movement remains active, cracking may continue despite reinforcement.
If cracking or movement recurs after installation, a specialist can assess the masonry and advise on suitable remedial work.
Helical bars can be cut to length and bent to suit brickwork crack stitching repairs.
Benefits and finish of helical bar repairs
Helical bar reinforcement can strengthen cracked masonry while retaining much of the existing brickwork. Its practical value depends on the repair design, the wall’s condition and the finish applied after stitching.
Because the bars sit within mortar joints, they can reinforce masonry without removing whole sections of sound brickwork. This can matter in older buildings, including heritage projects where preserving original fabric is important. Stainless-steel bars provide tensile reinforcement, and their twisted profile helps them bond with grout and surrounding material. The bars’ stated tensile strength is double that of rebar and four times that of epoxy glass-fibre.
At openings, masonry above a window or door may need reinforcement where cracking affects the area carrying the load. For masonry beaming, bars should extend at least 500 mm beyond each side of the opening. The minimum bed depth is 40 mm, with vertical spacing of 3 to 8 brick courses between the two sets of bars. These dimensions apply to the described beaming arrangement, not every crack-stitching repair.
The finished appearance depends on how the joints are restored after installation. Once grout has secured the bars, the mortar joints are repointed to match the existing masonry as closely as practical. Colour, aggregate and joint profile all affect how visible the repair is. A close match helps the stitched area sit naturally within the wall, although the repaired joint may still be distinguishable on close inspection.
Installation quality affects both reinforcement and finish. The grout must suit the masonry and environmental conditions, and the slots need to be cleaned before it is applied. Dust or loose debris can interfere with bonding. Following the bar manufacturer’s guidance on spacing, bonding and finishing helps keep the repair consistent with its design.
For lime mortar masonry, polymer-bound, non-shrink grout can be used to bond helical bars. Repair materials should be compatible with the existing wall; a hard, mismatched finish can alter how forces pass through older masonry. This matters particularly where preserving original fabric is more important than achieving a completely invisible repair.
If cracking or movement returns after repointing, seek a specialist assessment. A stable-looking joint is useful, but does not by itself confirm that the cause of cracking has stopped.
Helical bar stitching can provide local reinforcement while limiting the removal of sound masonry. Its benefit depends on appropriate placement, compatible grout and considered repointing. In a heritage wall, a window opening or a visibly cracked elevation, these details help balance structural reinforcement with the building’s existing appearance.
What are helical bars used for in brickwork repairs?
Helical bars are used to reinforce masonry where cracking has weakened a wall but the surrounding brickwork remains suitable for repair. Understanding when helical bars are used for brickwork repairs starts with the crack pattern and the wall’s condition. They are commonly applied to vertical and stepped cracks in brick, block or stone walls to help stabilise masonry and limit crack propagation.
A stepped crack following mortar joints can indicate movement across several courses, rather than damage to a single brick. Crack stitching connects sound masonry on either side of the damaged line. A vertical crack may also be stitched if assessment shows local reinforcement is appropriate. The pattern, position and surrounding masonry inform the repair design.
Cracking above windows and doors can occur where masonry carries loads across an opening. Helical bars may reinforce this area, forming a masonry beam within the bed joints. The design accounts for the opening, surrounding bricks and loads acting on the wall. Cracked bricks may also need replacing as part of the repair.
Helical bars are also used to stitch cracks in brickwork where assessment identifies a suitable repair. The bars are installed across the crack to connect sound masonry on either side and help stabilise the affected area. The repair design depends on the crack pattern, the wall’s condition and the surrounding masonry.
Helical reinforcement may suit movement-related cracking where assessment shows that crack stitching is appropriate. The cause and extent of the cracking inform the repair approach. If the masonry is suitable, installing bars across the crack can help stabilise the affected area.
Not every crack needs stitching. In a largely sound wall with isolated damage, reinforcement may preserve more existing masonry than rebuilding the affected section. Widespread deterioration may call for a broader response. A repair design should distinguish a local crack from a pattern extending across an elevation.
The type and role of the masonry matter too. A crack in external brickwork presents different considerations from a stepped crack or cracking above a doorway. Bar position, embedment and bonding materials must suit the substrate and repair design. These factors help determine when helical bars are used for brickwork repairs rather than another intervention.
When should helical bars not be used for brickwork repairs?
Helical bars are not a complete remedy for every cracked wall. They reinforce masonry across a crack but do not remove the force causing it. If cracking relates to subsidence, for example, the underlying issue needs attention before reinforcement. Installing bars first can leave the cause active and the masonry exposed to continued movement.
Drainage problems and soil movement are among the factors associated with subsidence-related cracking. A crack that continues to extend, or appears alongside other changes in the building, needs investigation before a repair is selected. The visible line alone does not show whether movement has stopped. A repair design must account for the cause and the condition of the affected wall.
Local stitching may be unsuitable if the surrounding masonry cannot provide a sound bond. Helical bars need to be secured in suitable material beyond the crack. If nearby bricks or mortar have deteriorated, reinforcement across the damaged area may not achieve its intended effect. The repair approach must reflect the masonry’s actual condition, not just the crack’s appearance.
Some cracks need more than crack stitching. Anchors or tie bars may be required alongside reinforcement, depending on how the masonry is moving and which parts need connecting. A crack above an opening, for example, may involve a different load path from a stepped crack across an otherwise sound wall. The design should establish whether bars alone address the structural problem.
Helical bars should not be treated as a substitute for addressing every form of movement. Ground movement, thermal expansion, structural loading and deterioration can all contribute to cracking, and each affects the wall differently. Where movement remains active, adding reinforcement without addressing its source can lead to further cracking or damage elsewhere in the masonry.
A structural engineer’s report and design are recommended before brickwork repairs with helical bars. This helps establish whether crack stitching suits the wall, whether additional reinforcement is needed and what installation arrangement will address the damage. The assessment should consider the crack pattern, surrounding masonry and any evidence of continuing movement, rather than rely on a standard repair method.
If cracking or movement reappears after reinforcement, contact a specialist for advice. This may indicate that the underlying cause remains active or that the repair needs reassessment.
What helical bar sizes, materials and embedment depths are commonly used in the UK
Helical bars for masonry repairs are commonly made from stainless steel, with 6 mm and 8 mm diameters described for this work. An 8 mm diameter is identified as a popular option, while 6 mm bars are also used in reinforced brick lintel designs. The correct diameter depends on the repair design, masonry condition and forces the reinforcement must resist.
Bar length follows the repair layout. Helical spiral bars are available in one-metre, three-metre and seven-metre lengths. A specialist determines the bar length and any bending required to suit the repair. The bar must extend beyond the damaged area and bond into sound masonry. The required extension depends on the design and crack pattern.
Embedment relates to how the bar sits within its prepared slot and surrounding grout. For crack stitching, the bed joint is raked out to at least 30 mm deep. This gives space for grout and reinforcement within the mortar joint. The required depth and bar position depend on the masonry, the bar specification and the repair design.
Lintel reinforcement uses a more specific arrangement. In the described method, two slots are placed between 300 mm and 900 mm apart vertically. A specialist determines how the bars are positioned in the grouted slots: the first is pushed in to about 75% of the slot’s depth, and the second is pressed into the grout to around 50% of the slot depth, with at least 10 mm between the bars. These figures apply to that lintel arrangement, not every crack-stitching repair.
For masonry beaming above an opening, the minimum bed depth is 40 mm. The bars extend at least 500 mm beyond each side of the opening, with vertical spacing of 3 to 8 brick courses between sets. These dimensions describe a particular reinforcement layout. They are not a universal specification for every window, doorway or cracked wall.
Grout choice also affects bonding. The material should suit the masonry and environmental conditions. Slot preparation, including the removal of dust and debris that could interfere with the bond, is determined as part of the specialist repair. In lime mortar structures, polymer-bound, non-shrink grout can be used to bond helical bars.
Bar diameter, slot depth, embedment and spacing work together. A larger bar does not automatically make a repair suitable if the joint cannot accommodate it or the design does not support it. Installation must follow the repair design and manufacturer’s guidance. This coordination helps the reinforcement bond correctly and allows the finished joint to be repointed appropriately.
CavClear
CavClear can investigate whether cracking is linked to a cavity wall or failing wall ties. A cavity wall survey or wall tie survey can assess relevant wall conditions and provide findings to inform the next step. This can be useful when cracks appear alongside signs of cavity wall movement, but it does not replace an assessment for helical bar repairs.
Where an inspection identifies failed wall ties, wall tie replacement can address that specific issue. The appropriate response depends on the findings and cause of movement, so crack stitching should not be assumed to suit every wall. If you are concerned about cracking or your cavity wall’s condition, contact CavClear to discuss a survey.
Choose the right next step for your property
Understanding when helical bars are used for brickwork repairs is one part of diagnosing a crack. The next step is to establish whether the damage is local to the masonry or connected to movement elsewhere in the wall. This distinction helps keep the proposed repair focused on the cause, not just the visible signs.
Where a cavity wall may be involved, CavClear offers wall tie surveys and wall tie replacement to address wall-tie issues. CavClear also carries out cavity wall insulation removal where existing insulation is defective. These services address cavity wall conditions and do not replace a helical bar repair design.
If you’re unsure what the cracking indicates, share your concerns and property details with CavClear so the relevant cavity wall issue can be considered. Contact CavClear about your property’s wall condition to discuss a suitable next step and move forward with greater clarity.
Frequently Asked Questions
What Is Helibar Crack Stitching?
Helibar crack stitching is a masonry repair method that uses helical reinforcement to connect cracked sections of a wall. “Helibar” is often used as a name for this type of repair, while helical bars describes the twisted metal reinforcement itself. A specialist assesses the crack pattern and surrounding masonry before deciding whether stitching is appropriate. The method reinforces the wall locally; it does not replace an assessment of the cause.
What types of masonry cracks can helical bars repair?
Helical bars can be used for vertical and stepped cracks in brick, block or stone masonry. A specialist considers whether the crack crosses several courses, runs through bricks or appears near an opening such as a window. This pattern helps distinguish local masonry damage from movement affecting a wider area. The crack’s shape alone cannot establish its cause; the surrounding wall and any signs of movement matter too.
How do professionals install helical bars in brick walls, step by step?
Professionals follow a repair design suited to the wall, rather than applying the same arrangement to every crack. The work generally proceeds through these stages:
- Assess the cracking and masonry condition.
- Set out the bar positions and prepare the mortar joints.
- Clean the slots, apply suitable grout and embed the bars.
- Finish the joints and inspect the repaired area.
The bar layout and materials follow the repair design and manufacturer’s guidance.
How long do helical bar repairs last, and what maintenance is needed?
The service life of a repair depends on the wall’s stability, the original cause of cracking and the quality of bonding and installation. If cracking or movement recurs after the work, a specialist should assess the masonry and the conditions affecting it.
Do helical bar repairs require a structural engineer or building regulations approval in the UK?
A structural engineer’s report and repair design are recommended before helical bar work. The material provides no basis for saying whether building regulations approval is required.
Recent Comments