
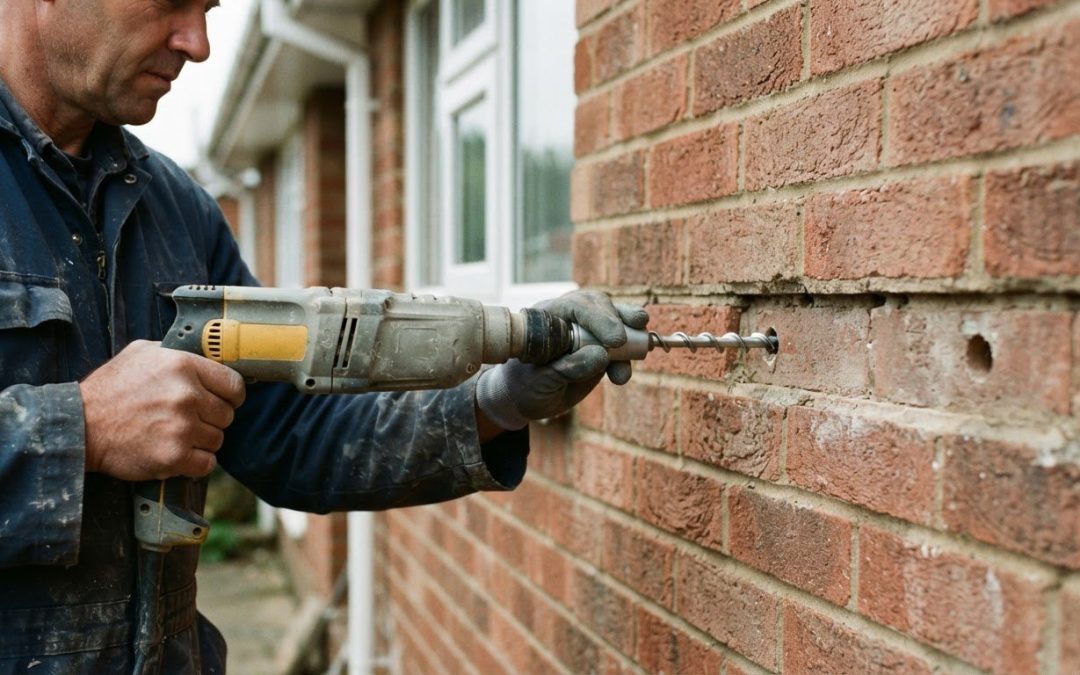
Pilot-hole diameter and depth are not one-size-fits-all. They must suit the replacement tie and the masonry, making that assessment a key part of how cavity wall tie replacement works.
It’s understandable to want a clear idea of what happens to your home’s walls during the work. In a standard brick cavity wall, a general guide is at least 50 mm of penetration into each leaf, but the specialist selects the hole dimensions to suit the tie and the wall construction.
This guide explains how the specialist assesses the wall, chooses and drills the pilot holes, installs and tests replacement ties, and manages the risk from corroding originals. You’ll also learn what affects the work plan, so you can understand the process before it begins.
Key Takeaways
- A specialist assesses the wall and replacement tie before selecting the pilot hole’s diameter and depth; the right dimensions depend on the masonry and fixing method.
- Replacement ties are positioned to reconnect the inner and outer leaves, with spacing planned around the wall layout and any openings.
- Testing helps assess whether ties are secure, while inspection also considers how corroding original ties could continue to affect the masonry.
- Mechanical expanding ties need to be installed to suit the wall materials, with the fixing and finished drill holes checked as part of the work.
- A survey-led plan helps establish the appropriate remedial work and the practical steps involved at the property.
Testing replacement ties and preventing corrosion damage
Replacement work addresses two related questions: whether new ties will hold securely and whether corroding originals could continue to affect the masonry. A survey establishes the wall’s condition and informs the appropriate remedial approach.
Corrosion can cause original mild-steel wall ties to expand inside mortar joints. The pressure may lead to horizontal cracks in brickwork, pointing or external render, sometimes at intervals of six brick courses. Cracking and movement can have other causes, so their pattern alone cannot confirm tie failure. A specialist locates and inspects the ties before recommending remedial work.
Signs of Corrosion and Structural Failure
Look for horizontal cracking across mortar beds, damaged pointing, cracked render or visible movement in the outer leaf. These signs can indicate expanding ties, but they need assessment alongside the wall’s construction and tie condition. A specialist survey records the findings and grades the ties from 1 to 9 using Table 2 of BRE Digest 401. For condition level 1, BRE Digest 401 suggests another inspection within ten years.
The grade helps connect inspection findings with the next step. Table 4 of BRE Digest 401 advises remedial action based on the corrosion scale. During a survey, electronic detection equipment helps locate and map existing ties. Where access allows, a borescope and camera provide a view inside the cavity. This helps distinguish visible corrosion from damage that needs a different explanation, rather than treating every crack as proof of tie failure.
Installing Corrosion-Resistant Replacement Ties
Replacement ties connect the inner and outer leaves using a corrosion-resistant fixing selected for the wall and exposure. In coastal areas, contaminated sand, or some prestige and historic buildings, 316 grade stainless steel is used as a suitable option. New ties are generally installed in positions staggered from the original ties. The specialist also considers whether the old ties need isolating.
Where original ties remain in the cavity, sleeves or foam can isolate their external ends and reduce the risk of continued expansion affecting the outer masonry. A tension test can then assess the holding performance of installed remedial ties. Testing may cover a random 5% of ties or as many as 100%, depending on the situation. A figure such as 1Kn is an example, not a universal pass threshold; the required result depends on the application. The test findings, tie locations and corrosion measures together inform the remedial record and any further action.
What is Cavity Wall Tie Replacement?
Cavity wall ties connect a building’s inner and outer masonry leaves, helping them work together. Replacement installs new ties when existing ones no longer provide a reliable connection.
Purpose and Types of Cavity Wall Ties
Each tie bridges the cavity while allowing the two leaves to remain separated. Original ties were often coated mild steel, while remedial options include mechanical, resin-fixed and helical ties. Helical replacement ties are described as 9 mm ties driven into a smaller pilot hole. The specialist selects the fixing type to suit the masonry and the connection required.
The aim is to create a secure connection without relying on a failing original tie. New ties are planned across the wall, usually in positions staggered from the existing ones. This distributes the connections through the masonry instead of simply repeating the original locations.
Why Wall Ties Fail and Need Replacement
Coated mild-steel wall ties were routinely used in UK house-building before 1981. If protective coatings deteriorate, corrosion can expand the metal inside mortar joints. That expansion places pressure on surrounding masonry and may contribute to cracking or movement in the external leaf.
A crack alone does not prove that wall ties have failed. A specialist locates and inspects the ties, then considers their condition alongside the masonry. Replacement is appropriate when the assessment shows that the ties no longer provide an adequate connection. This distinction matters because cracking and movement can have other causes.
Drilling and Installing Replacement Ties
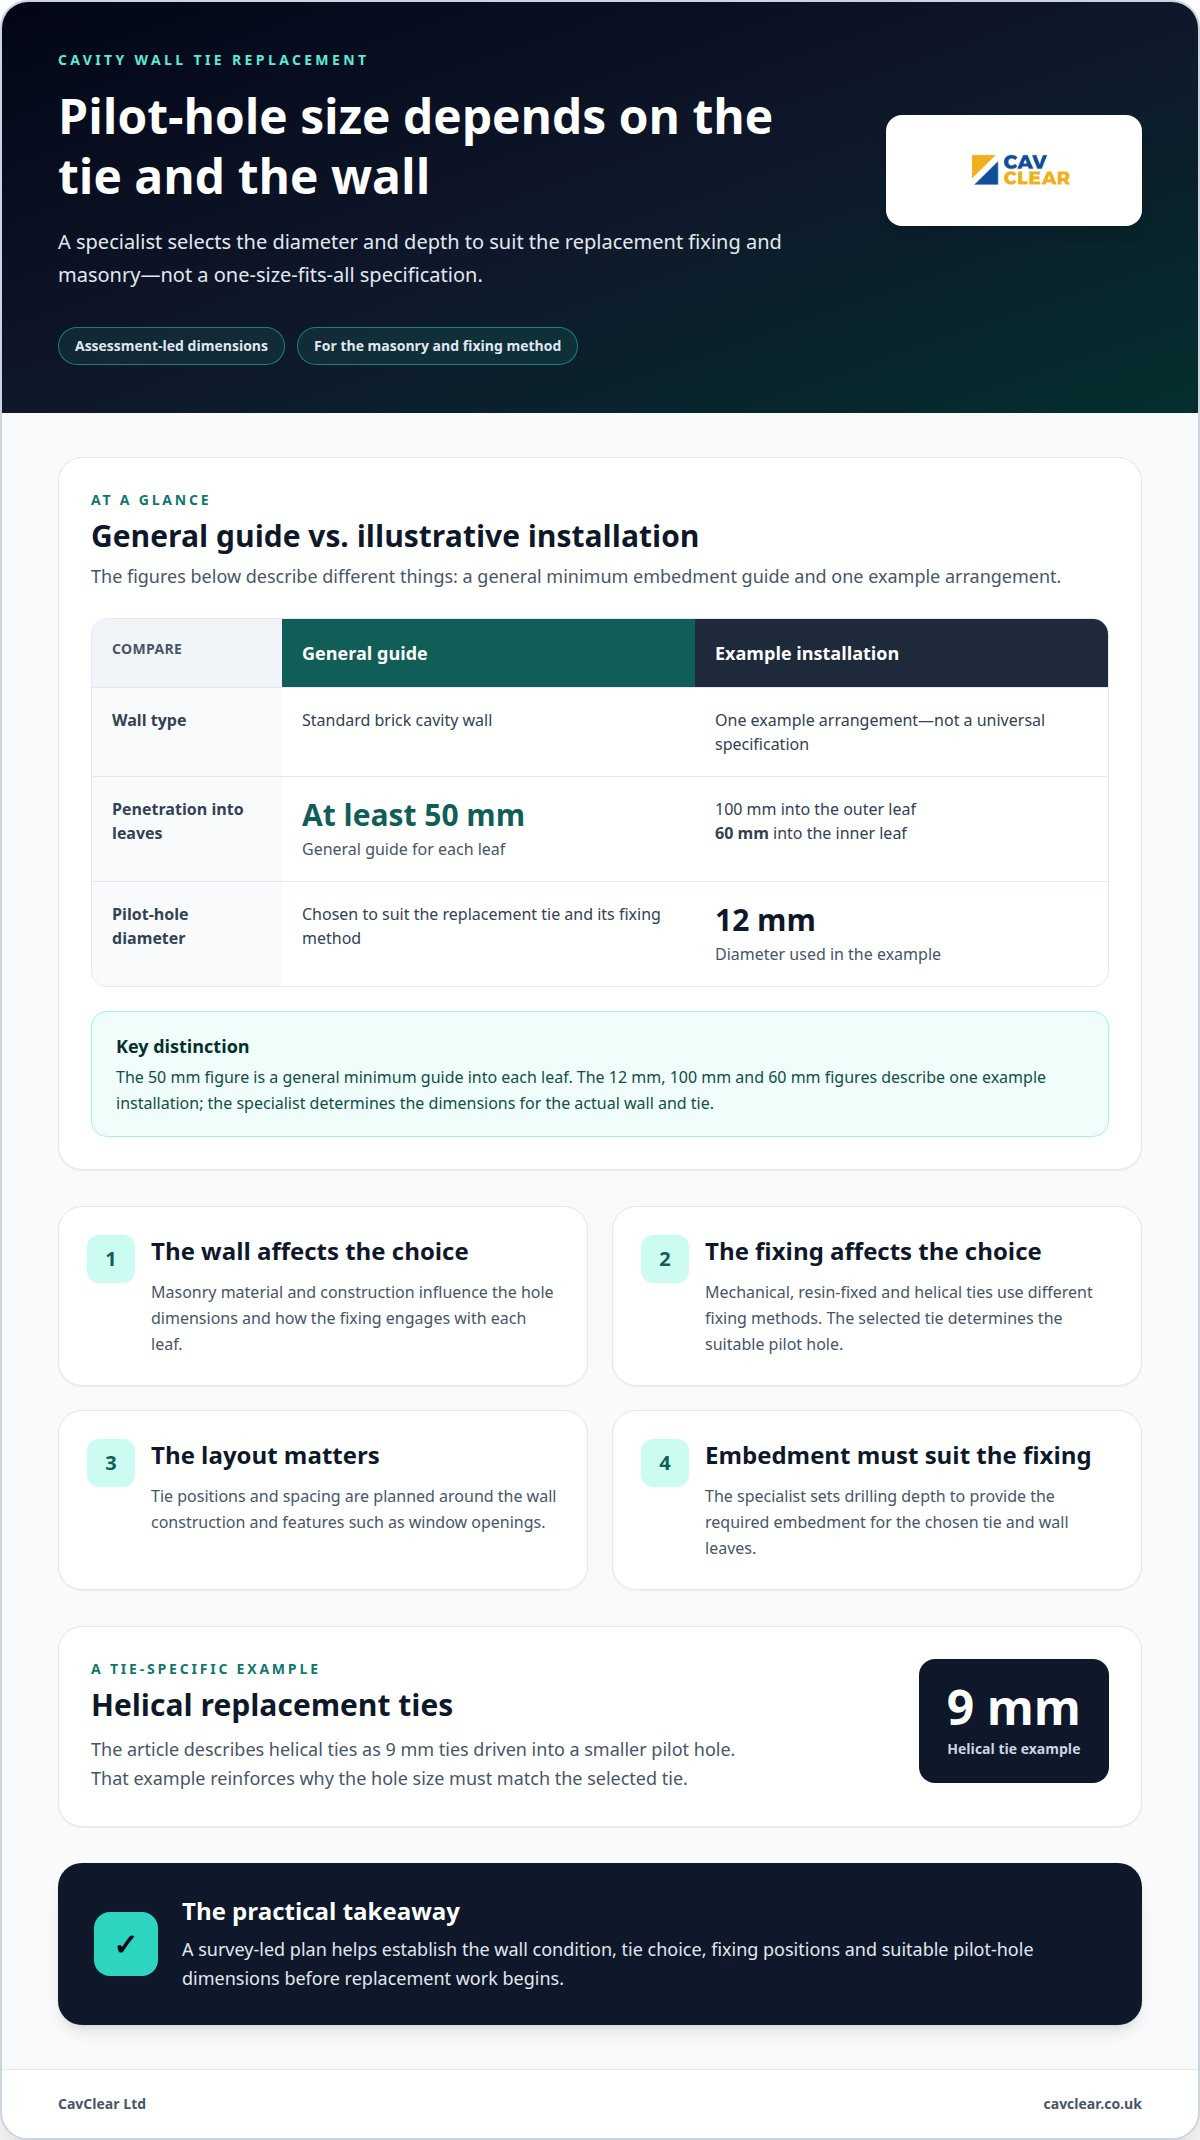
The specialist chooses the pilot hole to suit the selected tie, the masonry material and the depth needed for its fixing. An example installation uses a 12 mm hole, drilled 100 mm into the outer leaf and 60 mm into the inner leaf. Those dimensions illustrate one arrangement, not a universal specification for every wall.
Once fixing positions are planned, the installer drills through the outer face and fits each tie using its specified method. Mechanical ties grip within the masonry, while resin-fixed ties use resin to secure the fixing. The tie pattern and fixing method must suit the wall construction, rather than follow an assumed layout.
Isolating or Removing Original Ties
It is not always necessary to remove every original tie. If a corroding tie remains, the specialist may isolate its external end with a sleeve or foam to help limit the effect of continued expansion on the outer masonry.
Removal is a separate option, since taking out an embedded tie may require disturbing a brick. The appropriate approach depends on the tie’s location, condition and relationship to the new fixings. A cavity wall survey helps establish the existing tie positions and inform the replacement plan.
What diameter of pilot hole do the wall ties need and how deep?
Pilot-hole dimensions depend on the remedial tie, the masonry and how the fixing engages with each wall leaf. Spacing and tie density also vary with the wall construction and features such as window openings.
For a standard brick cavity wall, a general minimum is 50 mm of penetration into each leaf. The specialist sets the drilling depth to achieve the required embedment for the selected tie, while accounting for the masonry’s condition and thickness. The hole diameter must suit the tie and fixing method. Resin or grout fixings in softer materials may need a wider pilot hole to reduce bearing stresses.
Spacing establishes how replacement ties connect the leaves across the wall. A common remedial layout uses staggered positions at 900 mm horizontal centres and courses 450 mm apart. This arrangement provides a regular pattern across the masonry, rather than simply matching the original tie locations. A closer 450 mm by 450 mm pattern may be used in some situations, depending on the wall and remedial design.
Density is another way to describe the number of ties distributed across a wall area. One general replacement density is 2.5 ties per square metre. Different construction can require a different layout: where at least one masonry wall is less than 90 mm thick, the guide specifies 5.0 ties per square metre. For an inner wall of timber-frame construction, it specifies 4.4 ties per square metre. BRE Digest 329 provides guidance for selecting replacement ties for different masonry types.
Openings need their own spacing consideration because the masonry around a window or door differs from an uninterrupted wall. At cavity-wall door and window openings, ties are typically spaced at a maximum of 300 mm vertically. The specialist plans the pattern around each reveal and links it to the wider wall layout, rather than extending ordinary field spacing across the opening.
These figures describe layouts and penetration, not a universal hole size. The installer identifies the tie type and the materials it must fix into, then chooses a drill diameter and depth to suit. Soft masonry receiving resin or grout may need a different bore from one used for a mechanical fixing. The specialist also considers cavity width and leaf thickness when planning the replacement pattern.
Drilling details must fit the wider remedial plan: tie density, spacing, depth and fixing method all work together. A standard brick wall and a timber-frame inner leaf, for example, have different density requirements, so the same layout cannot be used for both. The installation plan is specific to the wall, with particular attention to areas around window and door openings.
Will the wall ties last the life of the building?
A replacement method alone cannot determine how long a repair will last. Durability depends on selecting a suitable tie, installing it correctly and addressing corrosion risks in the existing wall.
Mechanical expanding ties are fitted into drilled holes across the inner and outer leaves. The specialist selects a tie and hole to suit the masonry, then expands the fixing so it grips the surrounding material. Secure anchorage is essential: a tie that does not hold properly cannot provide the intended connection between the leaves. Installation follows the planned remedial layout.
Resin-fixed ties use resin to secure the tie within drilled masonry. The specialist chooses a fixing to suit the wall materials and follows its installation requirements. Unlike a mechanical expanding tie, which holds through its mechanical grip, a resin-fixed tie relies on resin for anchorage. Both methods aim to create a reliable connection across the cavity, not simply fill a hole.
Helical replacement ties are another option. These are 9 mm ties driven into a smaller pilot hole. Their suitability depends on the masonry and the connection needed. A specialist considers those factors before choosing the method, rather than treating every wall as if it has the same construction.
Installation also includes finishing the external face. According to the UK Government, replacement involves drilling through the brick face and repairing the hole with matching-coloured mortar. That repair helps restore the appearance of the outer leaf. The drilling and making-good process is localised, though the number and position of the holes depend on the remedial layout.
How long does cavity wall tie replacement take, and how disruptive is it? A reported example involved two workers completing work on a three-bedroom semi-detached house in a week, while the time for another property depends on its size, tie layout and access. Drilling and mortar repairs take place at the external wall, so the work involves localised noise and disturbance around those areas.
Installer training is another part of workmanship. City & Guilds designed a level 2 National Vocational Qualification for wall tie technicians. Remedial wall tie work is often accompanied by a 20-year guarantee, but the guarantee’s terms and scope matter as much as its duration. It doesn’t change the need for suitable materials, correct installation and attention to original ties that could continue corroding.
Lasting performance therefore rests on the whole repair: tie selection, anchorage, layout, testing and management of existing corrosion. A replacement tie reconnects the leaves, while the condition of the surrounding masonry and the original ties remains part of the structural picture.
What cavity wall tie replacement involves
Understanding how cavity wall tie replacement works means looking beyond visible cracks. A specialist assesses the cavity construction, tie positions and masonry condition, then plans installation and making-good work around the findings.
The assessment begins at the external wall. Electronic detection equipment helps locate existing ties, and a borescope can show the cavity where access allows. A small test hole through the outer face can be drilled to about 130 mm to check for a cavity. This gives the specialist information about the wall arrangement before marking the replacement positions.
Next, the specialist plans where the new ties should go. The layout takes account of the wall area, masonry type and openings, rather than assuming every elevation is the same. Replacement ties are generally staggered from the original positions, distributing them across the wall without relying on the locations of corroded ties.
- Locate and assess. The specialist maps existing ties and examines the construction, cavity access and visible damage before planning remedial work.
- Prepare fixing points. The installer drills through the brick face at marked positions. Hole diameter and depth suit the selected tie and receiving masonry.
- Install and secure. Each replacement tie is fitted using its specified mechanical, resin or other fixing method to connect the inner and outer leaves.
- Finish and inspect. The installer repairs the external drill holes and checks the completed work against the planned layout.
Original ties may remain if removing them would disturb the masonry. If corrosion could continue affecting the external leaf, the specialist considers isolating the tie’s outer end. The decision depends on the tie’s condition and its relationship to the new fixings, not simply on how the brickwork looks.
According to the UK Government, replacement involves drilling through the brick face and repairing the hole with matching-coloured mortar. This helps the repaired points sit consistently with the surrounding brickwork. Their number and position follow the remedial layout, while the finish must suit the existing masonry.
Testing can assess the holding performance of installed ties, and the testing approach depends on the project. The completed work should also be recorded, making tie positions and remedial actions clear. For a property showing cracking or suspected tie failure, arrange a wall tie survey to establish the wall’s needs before replacement begins.
Knowing how cavity wall tie replacement works also shows why the sequence matters: inspection informs the layout, the layout guides installation, and finishing completes the repair. Each stage responds to the specific wall rather than applying one assumed solution to every property.
CavClear: Wall Tie Replacement
CavClear carries out Wall Tie Replacement when a survey identifies failed or corroded ties that need remedial work. A survey-led assessment establishes the wall’s condition and the appropriate next step, rather than treating cracking alone as proof of tie failure.
For property owners concerned about movement or damaged masonry, CavClear carries out Wall Tie Surveys and Cavity Wall Surveys, providing clear findings and recommended remedial solutions. Where replacement is appropriate, the work restores the connection between the inner and outer wall leaves. If defective cavity wall insulation is also a concern, CavClear provides cavity wall insulation removal following a professional survey that confirms the need.
Contact CavClear to discuss a wall tie survey or replacement for your property.
Take the next step towards a sound repair plan
Understanding how cavity wall tie replacement works can help you approach the next decision with clearer expectations. The useful next step is to establish what is happening in your property, rather than treating visible cracking as a diagnosis. An assessment can turn concerns about movement or damaged masonry into findings and a practical remedial plan.
When discussing the property, describe where the cracking or movement appears and share any relevant inspection records you have. This information can help frame the assessment. The recommended response depends on the wall construction and tie condition, so work should be based on the property’s findings, not assumptions drawn from appearance alone.
CavClear carries out wall tie surveys and replacement, helping property owners move from concern to an informed decision about remedial work. If you’re ready to discuss the next step for your home, contact CavClear about wall tie replacement. A clear assessment can help you plan a considered route forward.
Frequently Asked Questions
Are there finishes like render which the wall ties will need to be fixed through effectively?
A rendered finish affects how the specialist accesses the masonry and plans surface repairs. The tie must be anchored into suitable wall material, not just the finish. The installer assesses the render and wall construction before drilling, then considers how to reinstate the affected area. The repair required depends on the finish and drilling positions, so it forms part of the work plan.
Can the look of the building be preserved, avoiding a ‘polka-dot’ effect?
Drill positions can be planned carefully, with holes repaired using mortar matched to the surrounding brickwork, to make them less conspicuous. Tie positions are also arranged in a consistent pattern rather than placed arbitrarily. Matching mortar helps repairs blend in, although the final appearance depends on the brick, mortar colour and condition of the external surface.
How can a specialist test remedial wall ties to check they are working?
A specialist may use pull-testing equipment to apply a controlled tensile load to selected remedial ties. Results are recorded and assessed against acceptance criteria, providing information about how securely the tested ties are held in the masonry. The test locations and number of ties tested depend on the project, so results are considered alongside the installation details and wall construction.
What Remedial Wall Tie Types are Available?
Common remedial options include mechanical expanding ties, resin-fixed ties and helical ties. Mechanical ties grip prepared masonry, while resin-fixed ties rely on resin to secure the fixing. Helical ties are driven into a smaller pilot hole. Corrosion-resistant stainless-steel wall ties connect the wall leaves. The suitable type depends on the masonry, fixing conditions and connection required.
What are the Signs of Wall Tie Failure?
Possible warning signs include horizontal cracks following mortar beds, cracked or bulging external masonry, and movement in a wall face. Cracks may appear near openings or across an elevation, but their appearance alone cannot confirm tie failure. A specialist considers their pattern and location alongside inspection findings, since other defects can also cause cracking or movement. A survey helps establish whether the ties need remedial attention.
What are cavity wall ties and why do they need replacing?
Cavity wall ties are metal connectors that link the inner and outer leaves of a cavity wall. They may need replacement if corrosion or deterioration stops them providing a sound connection. Corroding metal can expand within the wall and put pressure on surrounding masonry. An inspection establishes whether ties are failing and whether replacement is appropriate, rather than assuming every crack has the same cause.
What are the signs of cavity wall tie failure in UK homes?
In UK homes, specialists may investigate horizontal cracking in mortar joints, particularly where it forms a repeated pattern. Bulging brickwork or outward movement of an external wall also warrants assessment. These symptoms are not proof of tie failure: settlement, construction details and other masonry issues can cause similar damage. A specialist considers the wall and tie condition together before recommending remedial work.
Recent Comments