
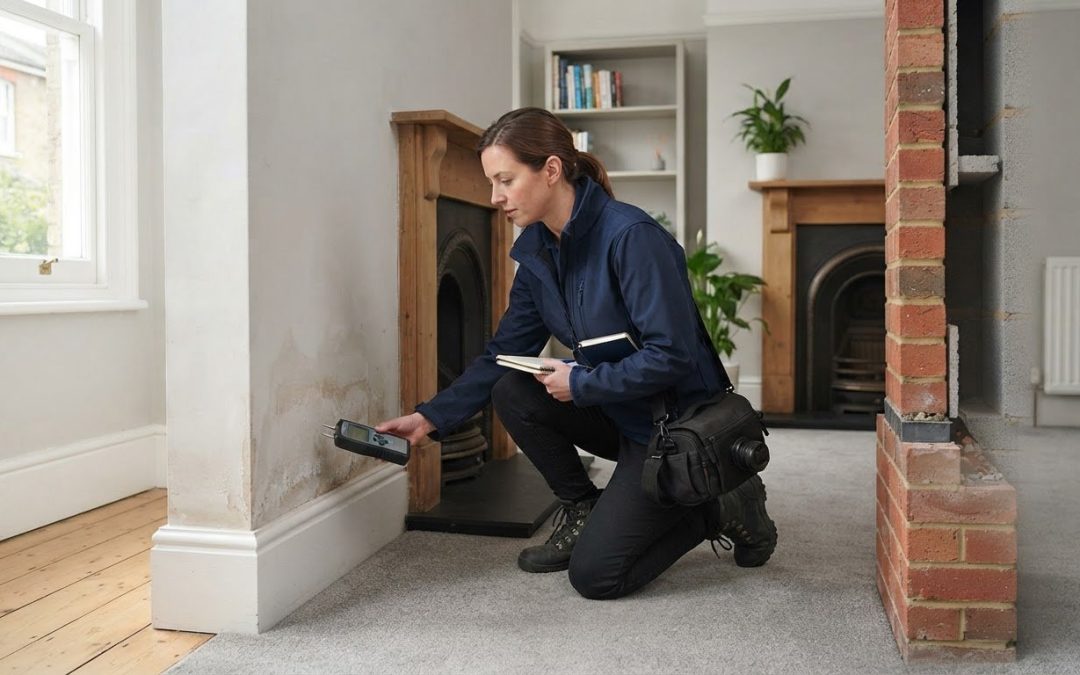
Damp does not automatically make a home unmortgageable. If you’re wondering whether fixing damp will stop your home from being unmortgageable, addressing the underlying cause and repairing any damage can help, but it does not guarantee mortgage approval. The property’s condition and the nature of the defect both matter.
It’s understandable to worry that damp or mould could disrupt a sale or mortgage application. The priority is to identify the source of the moisture, not simply cover the visible signs. This guide explains how different damp problems can affect a property, what building repairs may be needed and how to deal with mould. It also covers when a specialist assessment may help, including where cavity wall insulation or wall ties could be contributing to damp or cracking. Understanding the cause helps you take practical steps and make informed decisions about what to do next.
Key Takeaways
- Identify where moisture is entering or building up before choosing a repair; surface mould alone won’t reveal the underlying cause.
- Check whether a damp-proof course is missing, damaged or bridged by raised ground or other materials.
- Look for building defects such as leaks, poor ventilation, damaged brickwork or cavity wall problems that may be allowing damp to persist.
- Mortgageability depends on the property’s condition and the type and severity of the defect, so document repairs and their results.
- Consider a specialist cavity wall survey if damp, cracking or suspected insulation problems point to a defect inside the wall.
Groundwater, drainage and other causes of damp
Trace the moisture before choosing a repair. Groundwater, leaking drainage, rain penetration, condensation and cavity-wall defects each need a different response.
-
Identify the Types and Causes of Damp
Map each damp patch and note its height, shape and location before treating it. Rising damp generally affects the lower part of a ground-floor property. Penetrating damp may appear near a leaking roof, gutter, pipe or cracked wall. Condensation commonly forms on cold surfaces when everyday water vapour meets inadequate insulation, ventilation or heating.
In England, damp in a flat above the ground floor is not rising damp. Rising damp can affect the lower part of a ground-floor property, but its extent varies. Rare cases can reach about 1.5 metres. These patterns help guide inspection, but appearance alone doesn’t prove the cause.
-
Diagnose the Cause Before Treatment
Inspect outside first, then compare what you find with the indoor damp pattern. Check ground levels beside walls, blocked drains, overflowing gutters, failed seals, roof defects and visible cracks. Indoors, note leaking pipes, cold corners, window condensation and whether damp follows a particular wall or floor. Take dated photographs to record what you see.
A damp and timber survey is not a universal requirement for every UK mortgage application. A lender may request further inspection if a valuation identifies moisture, timber concerns or damage that needs investigation. The type and extent of the defect will inform that decision.
- Look beyond the visible stain to trace the water. A leaking downpipe can saturate masonry, while a blocked or broken drain may keep the ground beside a wall persistently wet—a problem that specialists like A&V Drain Corp. routinely resolve through professional drain cleaning and sewer repairs. Check whether paving slopes towards the building or raised soil touches the masonry. Damp patches and staining in cavity walls can also relate to insulation problems or moisture crossing the cavity.
Don’t seal, replaster or paint over a wet area before finding its source. Doing so can hide the signs without stopping water from entering. For example, staining beneath a leaking gutter may continue until the gutter fault is fixed, even if the damaged plaster has been covered.
- Carry out the repair, allow affected materials to dry and keep a record of the work. There is no single waiting period after damp repairs before applying for a mortgage or remortgage. Timing depends on whether the source has been corrected, the building has dried and the repair evidence addresses the concerns noted during valuation.
Lenders assess rising damp, penetrating damp and condensation by considering the suspected cause, location, extent, visible damage and effect on the property. Evidence that a leak or drainage defect has been repaired can help explain the condition. Persistent moisture, damaged finishes or unresolved cavity-wall concerns may lead to further assessment.
Damp-proof courses and how they can fail or be bridged
Inspect the damp-proof course (DPC) and the surfaces around it before deciding what needs repair. A working DPC can be bypassed by raised ground, connected materials or a separate source of penetrating moisture.
- Find the DPC line on the outside wall and compare it with the ground. A DPC is often positioned about 6 inches above ground level. It may appear as a thin horizontal line or a course of different material between bricks. Don’t assume its absence means failure: properties built before the late 19th century commonly have no DPC.
Check several points along the wall, including near corners and extensions. A visible break, damaged section or change in ground height may help explain why moisture affects one area more than another.
- Check whether raised ground or paving could bridge the DPC. Soil, a patio, path or garden bed piled against the wall can let moisture pass above the barrier. Compare the DPC height with the adjoining ground beside each damp patch, not just at the front entrance.
Look for a similar bridge inside. A solid floor, stored materials or plaster that extends down to a damp floor can provide another route for moisture. Record the precise locations before arranging repairs.
- Inspect render, pointing and external finishes where they meet the DPC. Render that continues below the barrier can create a route for moisture, while damaged pointing may let rain penetrate the masonry. Check whether staining is limited to the wall base or appears higher up near a defect.
Also examine steps, decking and extensions that meet the wall. These features can hide the DPC or hold water against the brickwork. Don’t remove render or dig beside foundations without first understanding the construction and possible effects.
- Rule out plumbing and bathroom leaks before assuming the DPC has failed. A leaking bath seal, waste pipe or supply pipe can wet nearby walls and floors, creating staining that resembles rising damp. Check whether the affected area lines up with a bathroom, kitchen or concealed pipe route.
Penetrating damp can also enter through cracked pointing, defective rainwater goods or damaged masonry. If a damp patch follows a specific defect, repair that source first. Replacing or treating a DPC will not stop moisture coming through a leaking pipe or exposed wall.
- Record the evidence and match repairs to the identified route. Photograph the DPC, adjacent ground, internal finishes and any visible defect from consistent positions. Note whether moisture appears after rain or relates to water use, such as a bathroom leak. These details can help distinguish a bridged barrier from penetrating damp.
If damp or cracking points to a cavity-wall issue, a cavity wall survey can help investigate the wall construction and possible defects. Keep the diagnosis specific: correct the moisture pathway, then monitor the affected area as the wall dries.
Professional advice for damp remediation
Use a diagnosis-led plan and keep clear records of findings and completed work. This helps show how each repair relates to the property’s condition.
-
Seek Professional Advice
Choose an assessment that investigates the cause, not just the visible stain. Ask for findings that distinguish condensation, rising damp, penetrating moisture and cavity-wall concerns. The British Standards Institution identifies BS 5250 as a guideline professionals use when assessing damp. A useful report describes observed defects, likely moisture routes and practical next steps.
Take dated photographs before work begins. Include examples such as staining beside a window, damp plaster near a floor or mould on a cold corner. These records help you compare the property’s condition after cleaning and repairs.
-
Choose Repairs and Treatments Lenders Accept
Match each repair to the identified problem. A leaking gutter needs attention to the rainwater route; condensation may call for changes to ventilation or heating. Treat rising damp only when the evidence supports that diagnosis. A surface coating alone will not resolve moisture entering through a defective wall or cavity.
There is no universal treatment list for every UK mortgage assessment. Keep the specialist report, work description, photographs and follow-up observations together. This gives a lender a clear account of the defect identified and how the work addressed it.
-
Consider Survey and Treatment Costs
Set the survey scope according to the property and the signs being investigated. Relevant factors include the affected rooms, access to external walls, visible damage and whether a cavity-wall concern needs specialist examination. A focused investigation can help distinguish a local defect from moisture affecting several areas.
Before work begins, make sure the proposed treatment matches the findings. For example, a report identifying a roof leak should lead to action on that source, rather than an unrelated wall treatment. A clear scope keeps the investigation and remedial work focused on the actual problem.
-
Address an Unmortgageable Property
Ask the surveyor or lender to identify the property concern and the evidence needed to review it. Buyers can use this information to understand whether the issue involves active moisture, damaged finishes or a cavity-wall defect. Sellers can organise findings and completed work into a clear record for the property file.
Keep documents describing the work carried out, such as reports, photographs and completion records. The paperwork will depend on the type of work. A clear description of the repair and how it relates to the original finding can help explain the property’s condition during a later assessment.

Removing mould and correcting building deficiencies
Remove visible mould as part of a repair sequence, not as a substitute for fixing the building fault. Work through the affected rooms systematically and record any changes afterwards.
- Photograph each mould patch before cleaning and note the room, surface and nearby features. For example, record marks on a kitchen ceiling, behind a wardrobe or beside an external wall. This gives you a useful comparison after cleaning and repairs. Don’t assume appearance alone identifies the cause; note details such as peeling paint, damaged plaster or a musty smell.
In England, persistent mould is a reason to investigate the property’s condition rather than simply redecorate. Keep photographs with notes about when the mould appeared and whether it returned after previous cleaning. These records help show whether the affected area is changing.
- Read the cleaning product instructions and use a method suitable for the affected surface. Treat a small patch on washable bathroom tiles differently from mould embedded in damaged plaster. Avoid spreading debris into adjoining rooms, and don’t paint over a stained surface before cleaning and drying it.
Check the full affected area, including behind furniture and around window frames. Mould may be less visible in a corner or behind a cupboard than on an open wall. Record any damage to wallpaper, sealant or plaster that may need separate attention.
- Inspect the property for defects that need repair, such as a leaking kitchen pipe, damaged window frame or cracked external masonry. Note where each defect is and where mould appears nearby. A patch beneath a pipe joint, for example, calls for investigation of that plumbing connection rather than repeated surface cleaning.
Check ventilation in rooms where moisture builds up during cooking or bathing. Look at the extractor fan, air vents and window openings, and note whether they are obstructed or not working. These checks can help distinguish a ventilation issue from damage that needs a building repair.
- Correct the identified defect before replacing damaged finishes. Allow wet plaster or other materials to dry, then decide whether they need repair or replacement. Painting over damp plaster can hide the mark while leaving the damaged surface underneath. Keep notes of the work completed and areas affected.
If damp or mould is associated with a cavity-wall concern, don’t assume indoor cleaning will resolve it. Record any related external staining, damaged brickwork or cracking for further investigation. Treating the internal surface alone will not correct a defect within the wall structure.
- Revisit the cleaned and repaired areas as part of follow-up. In England, a landlord should check whether damp and mould have returned at least 6 weeks after repairs. Compare the same surfaces with the original photographs, including the kitchen, bathroom and affected external-wall areas.
If mould reappears, document its location and any changes since the repair. A recurring mark may indicate that the work needs review or another source is affecting the building. Use these observations to guide further investigation instead of repeating decoration alone.
What damp problems can make a UK property unmortgageable?
Damp alone does not determine mortgageability. Assess its cause, extent, effect on the building and whether the defect remains active.
- Check whether moisture has damaged structural parts or only surface finishes. A small patch of condensation on a bedroom window differs from persistent moisture affecting floors, joists or masonry. Note whether plaster is crumbling, timber feels damp or brickwork shows movement. The extent and location of damage help establish the seriousness of the issue.
Rising damp generally affects the lower part of a property’s ground floor, reaching up to about one metre. Condensation can develop when a home cannot manage everyday water vapour because insulation, ventilation or heating is inadequate. Compare the visible evidence with these patterns before arranging repairs.
- Look for active water entry and defects that could continue damaging the building. Examples include a leaking roof, failed guttering, cracked external walls and plumbing leaks. Damp near a ceiling beneath a roof defect may have a different cause from moisture at the base of a wall. Record the location and any visible damage.
Unresolved penetrating damp matters because its source may continue wetting masonry and internal finishes. A surface repair alone will not address a leak or defect that remains active. Check whether staining changes after rainfall or appears near a pipe, window or external crack.
- Assess whether mould or condensation is isolated or recurring. Mould behind furniture, on a cold corner or around windows may indicate moisture building up indoors. Check the room’s ventilation, heating and insulation, then note whether moisture appears during everyday activities such as cooking or bathing.
Condensation does not automatically mean a home cannot be mortgaged. Concern is greater when it persists, damages finishes or points to a wider building problem. Consider the cause of visible mould, and don’t treat repeated cleaning as a complete remedy.
- Check for cavity-wall symptoms alongside damp. Persistent wet patches, damaged brickwork, cracking or signs of moisture crossing a cavity may point to a defect beyond internal condensation. Cavity wall insulation problems may be relevant where damp appears on external walls or follows exposure to weather. Record any cracking and whether it changes around openings or wall corners.
Wall tie corrosion can also be associated with cracking or movement in masonry. Damp and cracking together warrant careful assessment of the wall, rather than assuming one has caused the other. A cavity wall survey can help investigate concerns within the cavity and clarify what remedial work may be needed.
- Prepare a clear record of the defect and completed repairs. Keep dated photographs, inspection findings, repair details and observations showing whether moisture or damage has returned. This evidence helps explain the property’s condition during a valuation and distinguish a corrected fault from an ongoing problem.
Mortgage decisions depend on the property’s condition and the lender’s assessment. Active leaks, extensive damage, unresolved structural concerns or damp that continues after repairs may raise more questions than a treated, documented defect. Focus first on identifying the source, correcting it and recording the result.
CavClear: Cavity Wall Insulation Removal
CavClear provides cavity wall insulation removal when defective or incorrectly installed insulation is linked to damp inside a property. Removing the material can address a cavity-wall moisture issue, while a cavity wall survey can help identify problems such as wet insulation or moisture crossing the cavity.
If damp appears alongside cracking or signs of wall movement, a wall tie survey can investigate whether the ties need attention. This specialist assessment helps clarify the fault and inform appropriate remedial work. It may be relevant when general repairs have not resolved the damp or a survey identifies concerns within the cavity wall.
Take the Next Step Towards a Sounder Property
Mortgageability is easier to assess when the building’s condition is clearly understood. If you’re still asking whether fixing damp will stop your home from being unmortgageable, focus on what remains unresolved and what evidence can show the cause has been addressed. A clear, property-specific plan gives you a practical basis for deciding what to do next.
Where damp appears alongside cavity-wall insulation problems, cracking or signs of movement, specialist investigation can help clarify the issue. CavClear provides Cavity Wall Insulation Removal, Wall Tie Surveys and Wall Tie Replacement to address cavity-wall concerns that may contribute to moisture or masonry defects.
Share your property concerns with CavClear and discuss the relevant specialist service. Contact CavClear about damp and take a considered next step towards protecting your home.
Frequently Asked Questions
Will fixing damp make a UK house mortgageable again?
Repairing the source of moisture and related damage can address a property concern, but it does not automatically secure mortgage approval. If you’re asking whether fixing damp will stop your home from being unmortgageable, the answer depends on the building’s remaining condition and the lender’s assessment. For example, keep records of a repaired roof leak and replaced damaged finishes so the work can be clearly explained.
Can a lender still refuse a mortgage after damp has been fixed?
Yes. The answer to “Will fixing damp stop my home from being unmortgageable?” depends on more than the repair itself. A lender may still decline if its valuation identifies another concern, visible damage remains or the evidence does not address the reported issue. A repaired leak, for instance, may not resolve separate cracking or a cavity-wall defect. Keep records for each repair and make the property accessible if another inspection is needed.
Do UK building regulations, guarantees or certificates apply to damp repairs?
Damp-proofing treatments often come with guarantees lasting 20-30 years. According to legislation.gov.uk, in England, works to heating and ventilation systems and replacement of windows are controlled work and must comply with the Building Regulations 2010. For domestic retrofit, guidance recommends PAS 2035 and an installer certified to PAS 2030 and registered with TrustMark.
Recent Comments